React Three Fiber Character Animation
Building 3D scenes with static objects and shapes is cool and all, but it's much cooler when you can bring a scene to life with animation. In the 3D world there is a process called character rigging which allows you to create special objects called armatures that act like a system of bones and joints. These armatures attach to a piece of 3D geometry like a person, animal, or whatever and allow you to bend and move the joints to deform the attached geometry. You can use this process to create animations by creating key frames between different poses of the armature. This tutorial won't teach you how to create one of these rigged characters, but it will teach you how to use one that's already been created in React Three Fiber.
This tutorial consists of three main parts. Acquiring a pre-rigged 3D model and a set of animations from the Mixamo service, preparing that model for use in WebGL in Blender, and then using that model in React Three Fiber. Why are we bothering to go through the first two parts in a React tutorial? Well it's so if you want to repeat the process to prepare some other rigged animation you will be able to. Let's get started.
Prerequisites
You will need to have Node installed to follow this tutorial.
Finding Free Characters and Animations on Mixamo
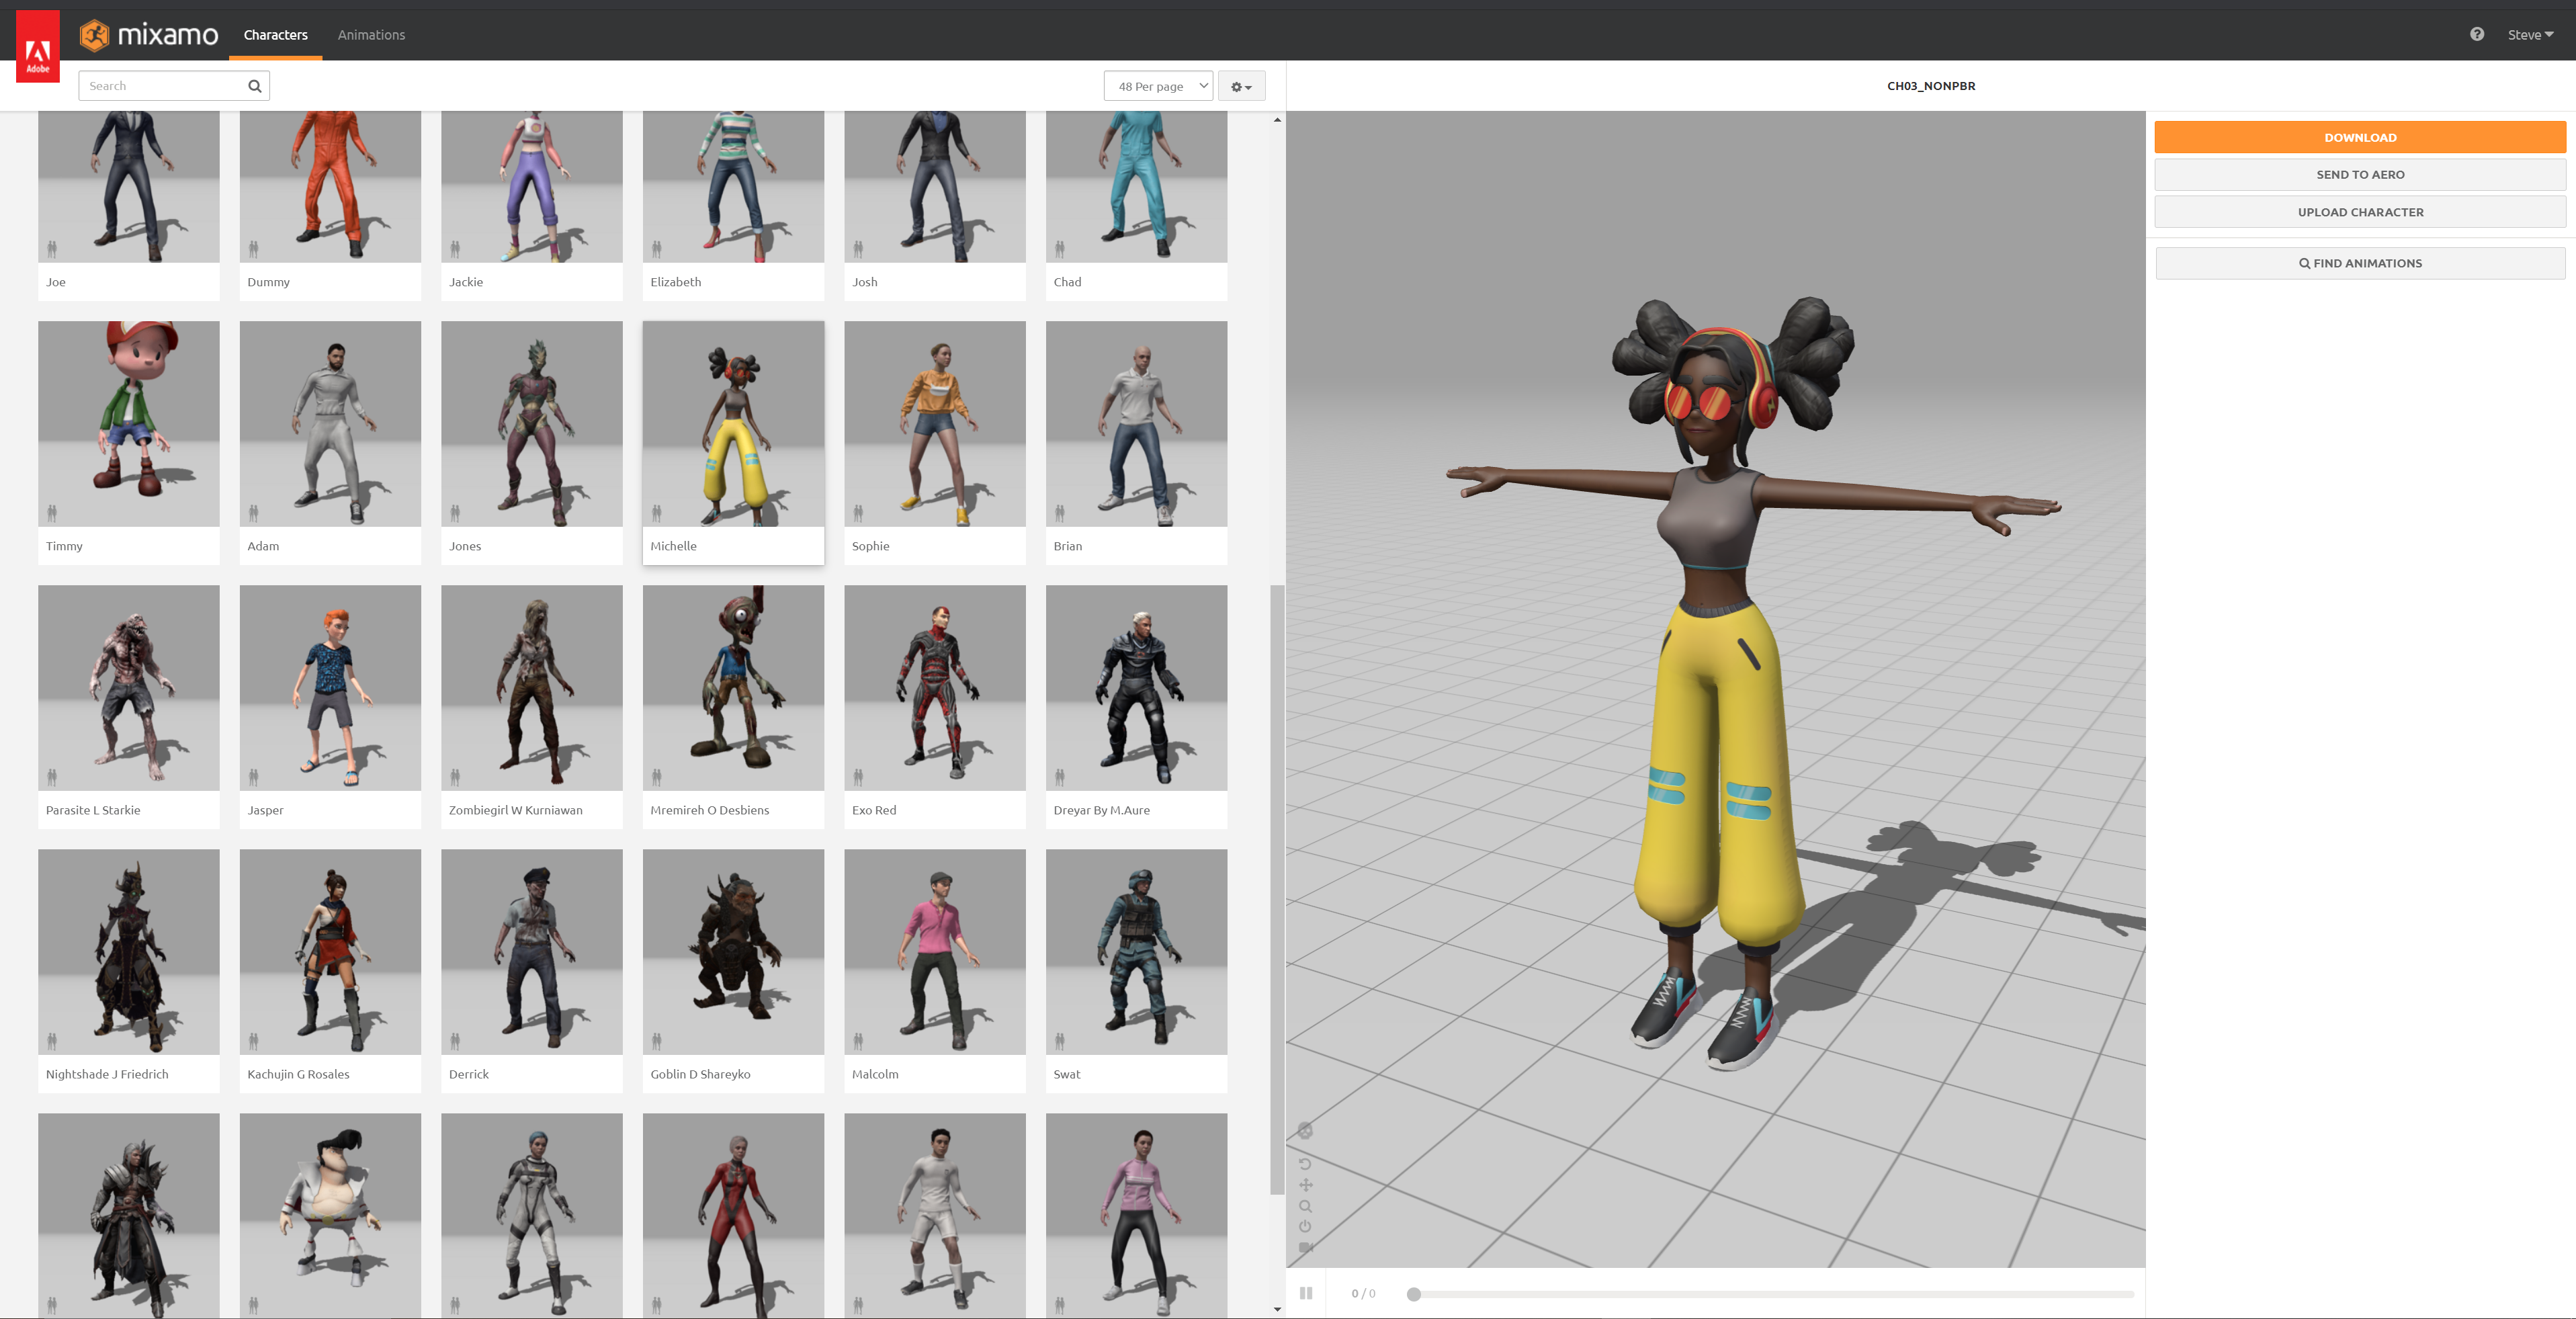
First let's find a character and a set of animations to use. For that we can use Mixamo, a free library of character models and animations provided by Adobe. If you don't have an account you'll need to create one first.
Step 1 Log in to Mixamo (Or Create a Free Account)
Step 2 Find a Character to Download. Use the Michelle character if you want to use the same one as the tutorial.
Step 3 Download the Capoeira animation pack. You can choose another animation pack if you want but using the same one will make it easier to follow the tutorial. This is because the names of the animations will differ and may cause some significant divergence from the tutorial.
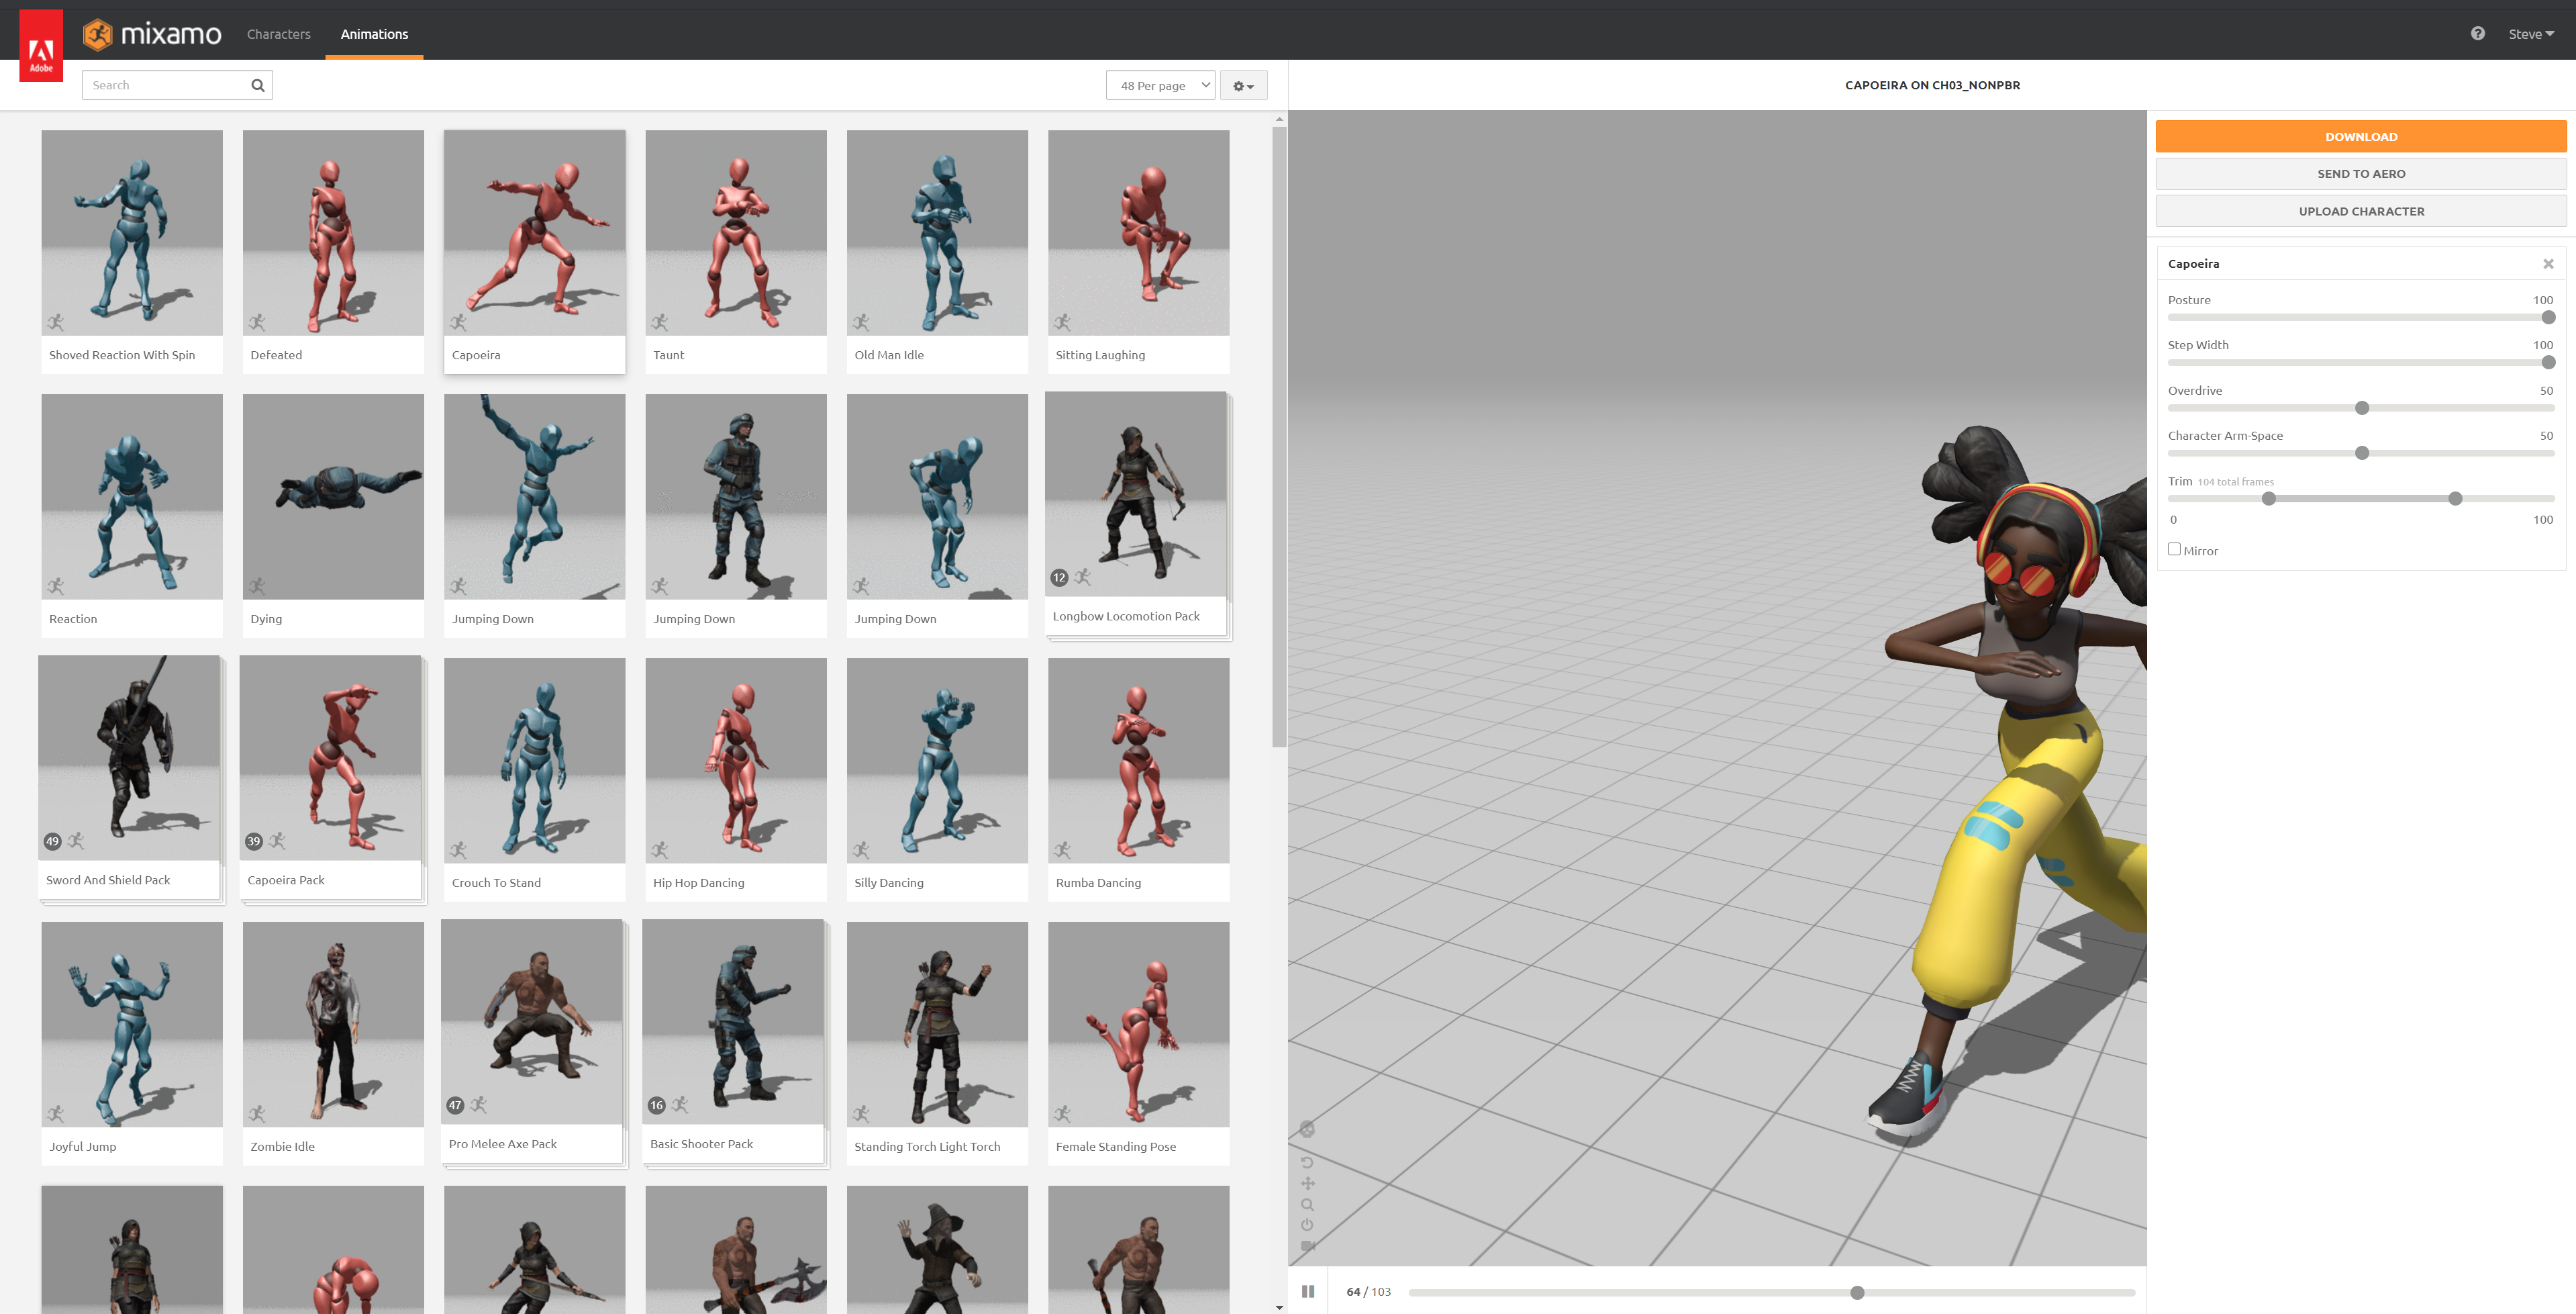
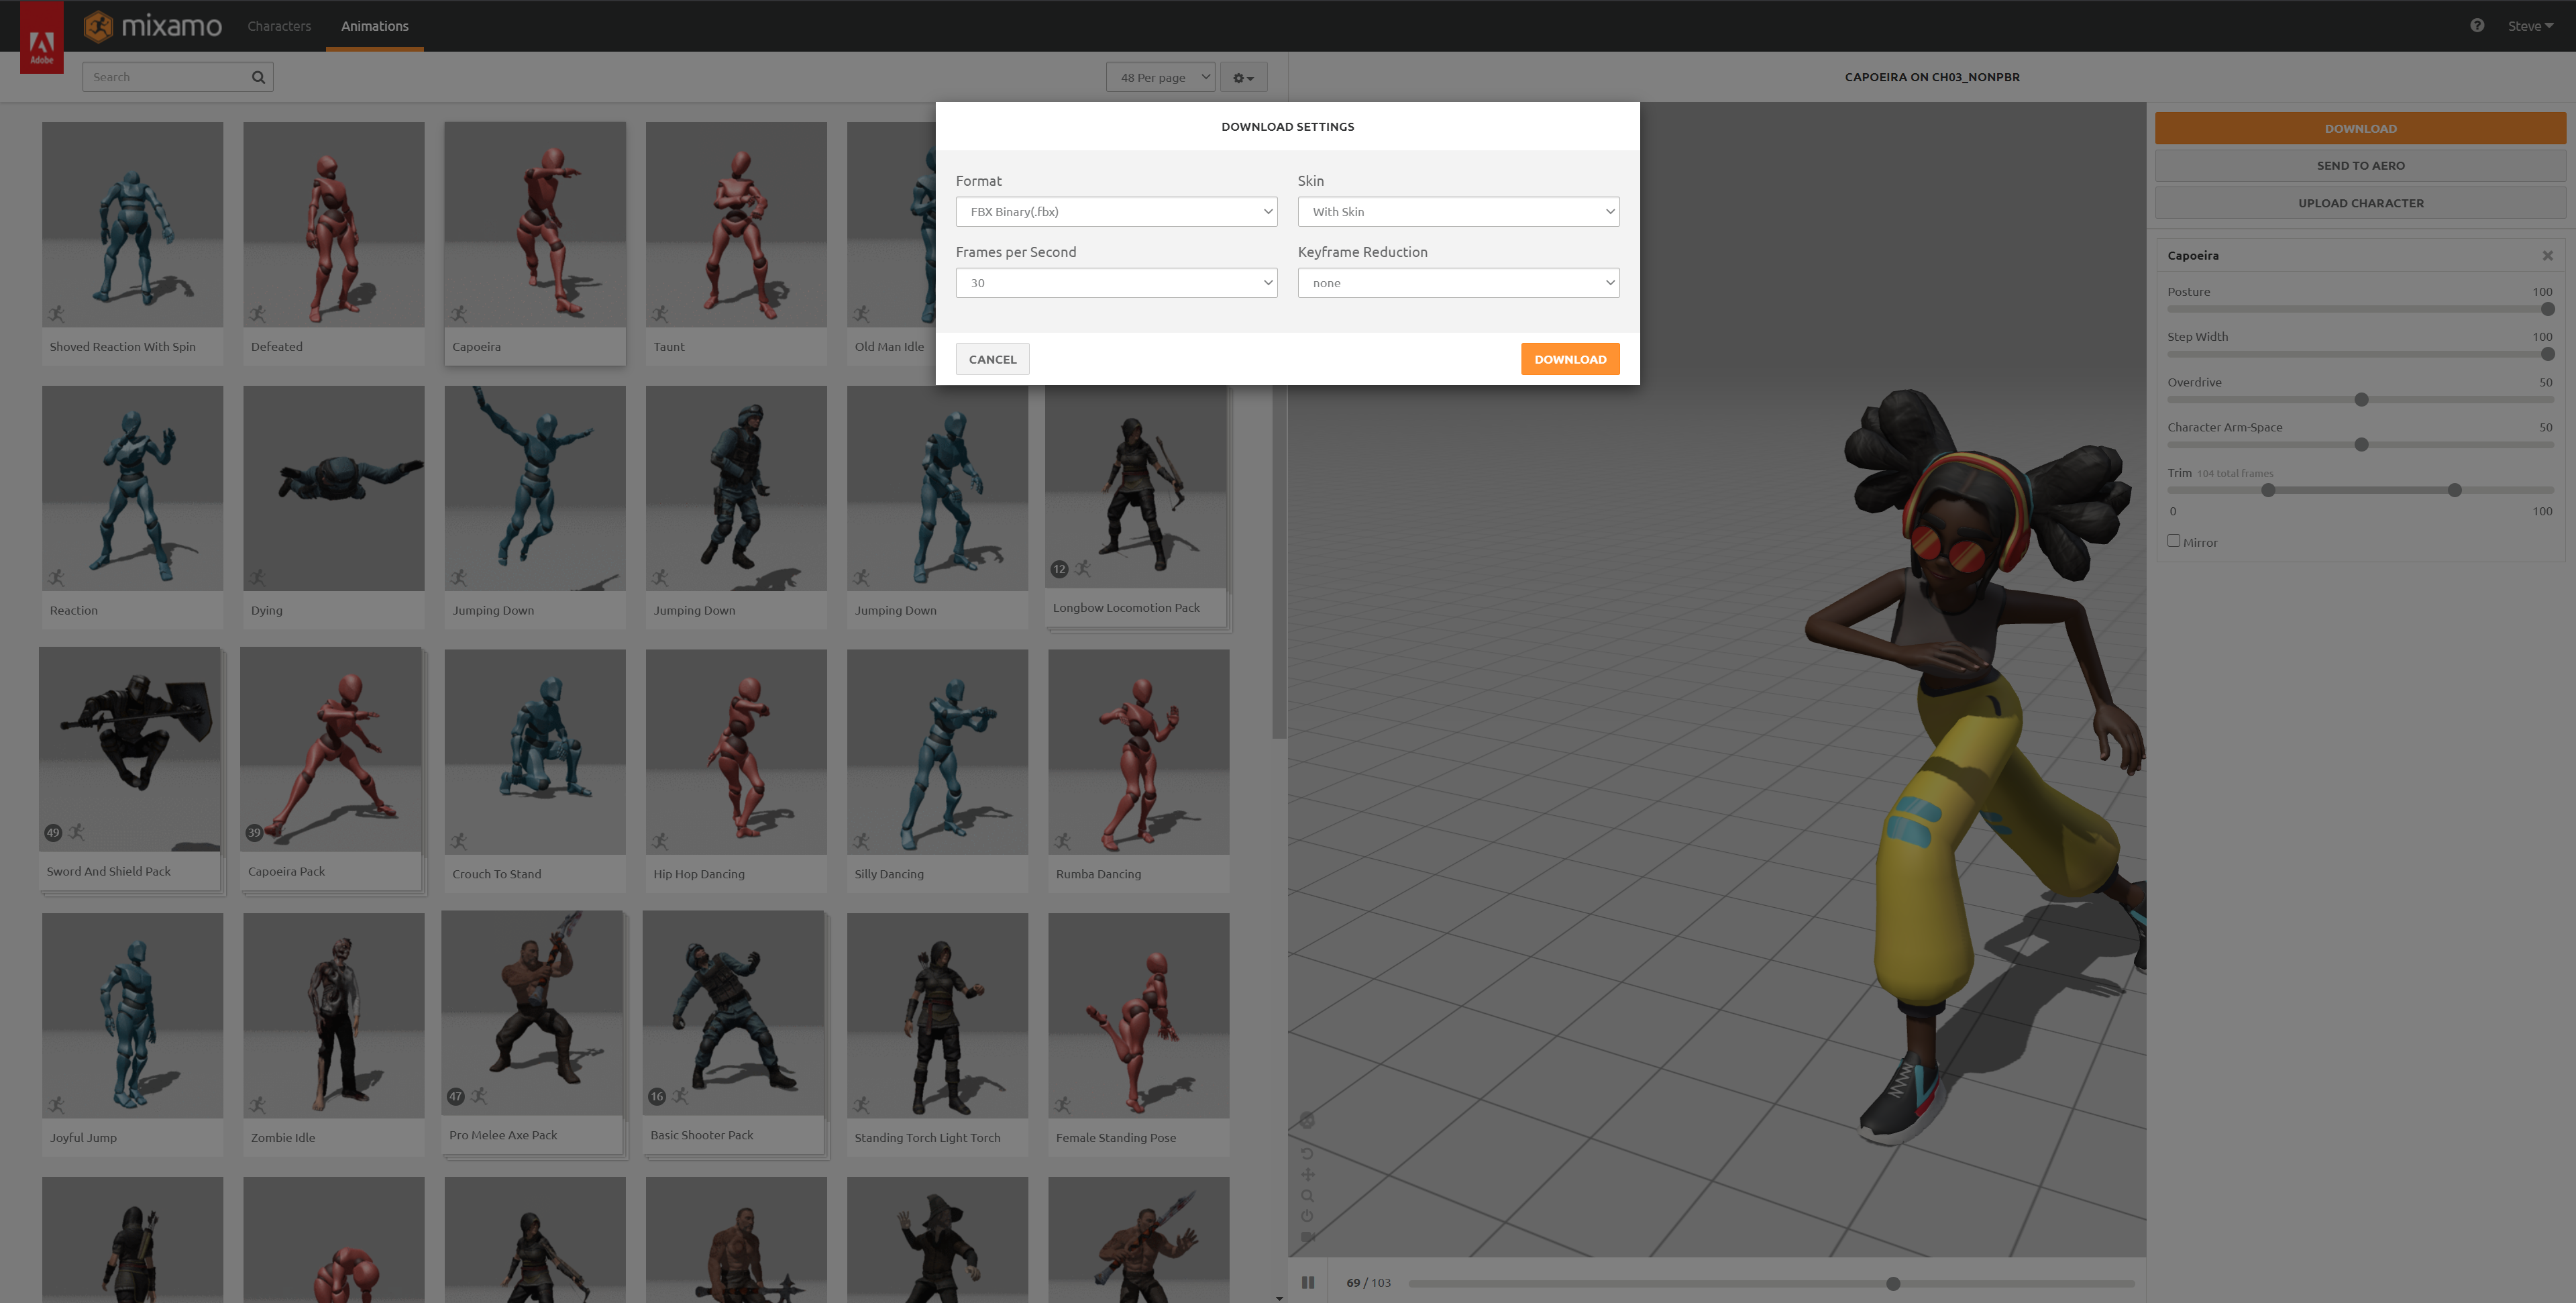
Step 4 Download the zipped resource files as an FBX. You can use all the default options when downloading.
Step 5 Extract the contents of the download .zip file to a folder somewhere you can find later.
Installing Blender
You will need Blender to convert the Mixamo Rig into a GLTF file suitable for WebGL. You can download the latest version here. Download Blender .
Importing a Character Model in Blender
After you have Blender up and running its time to import the model.
Step 1 Open a new project from the Blender welcome menu. You can just choose the "General" project template.
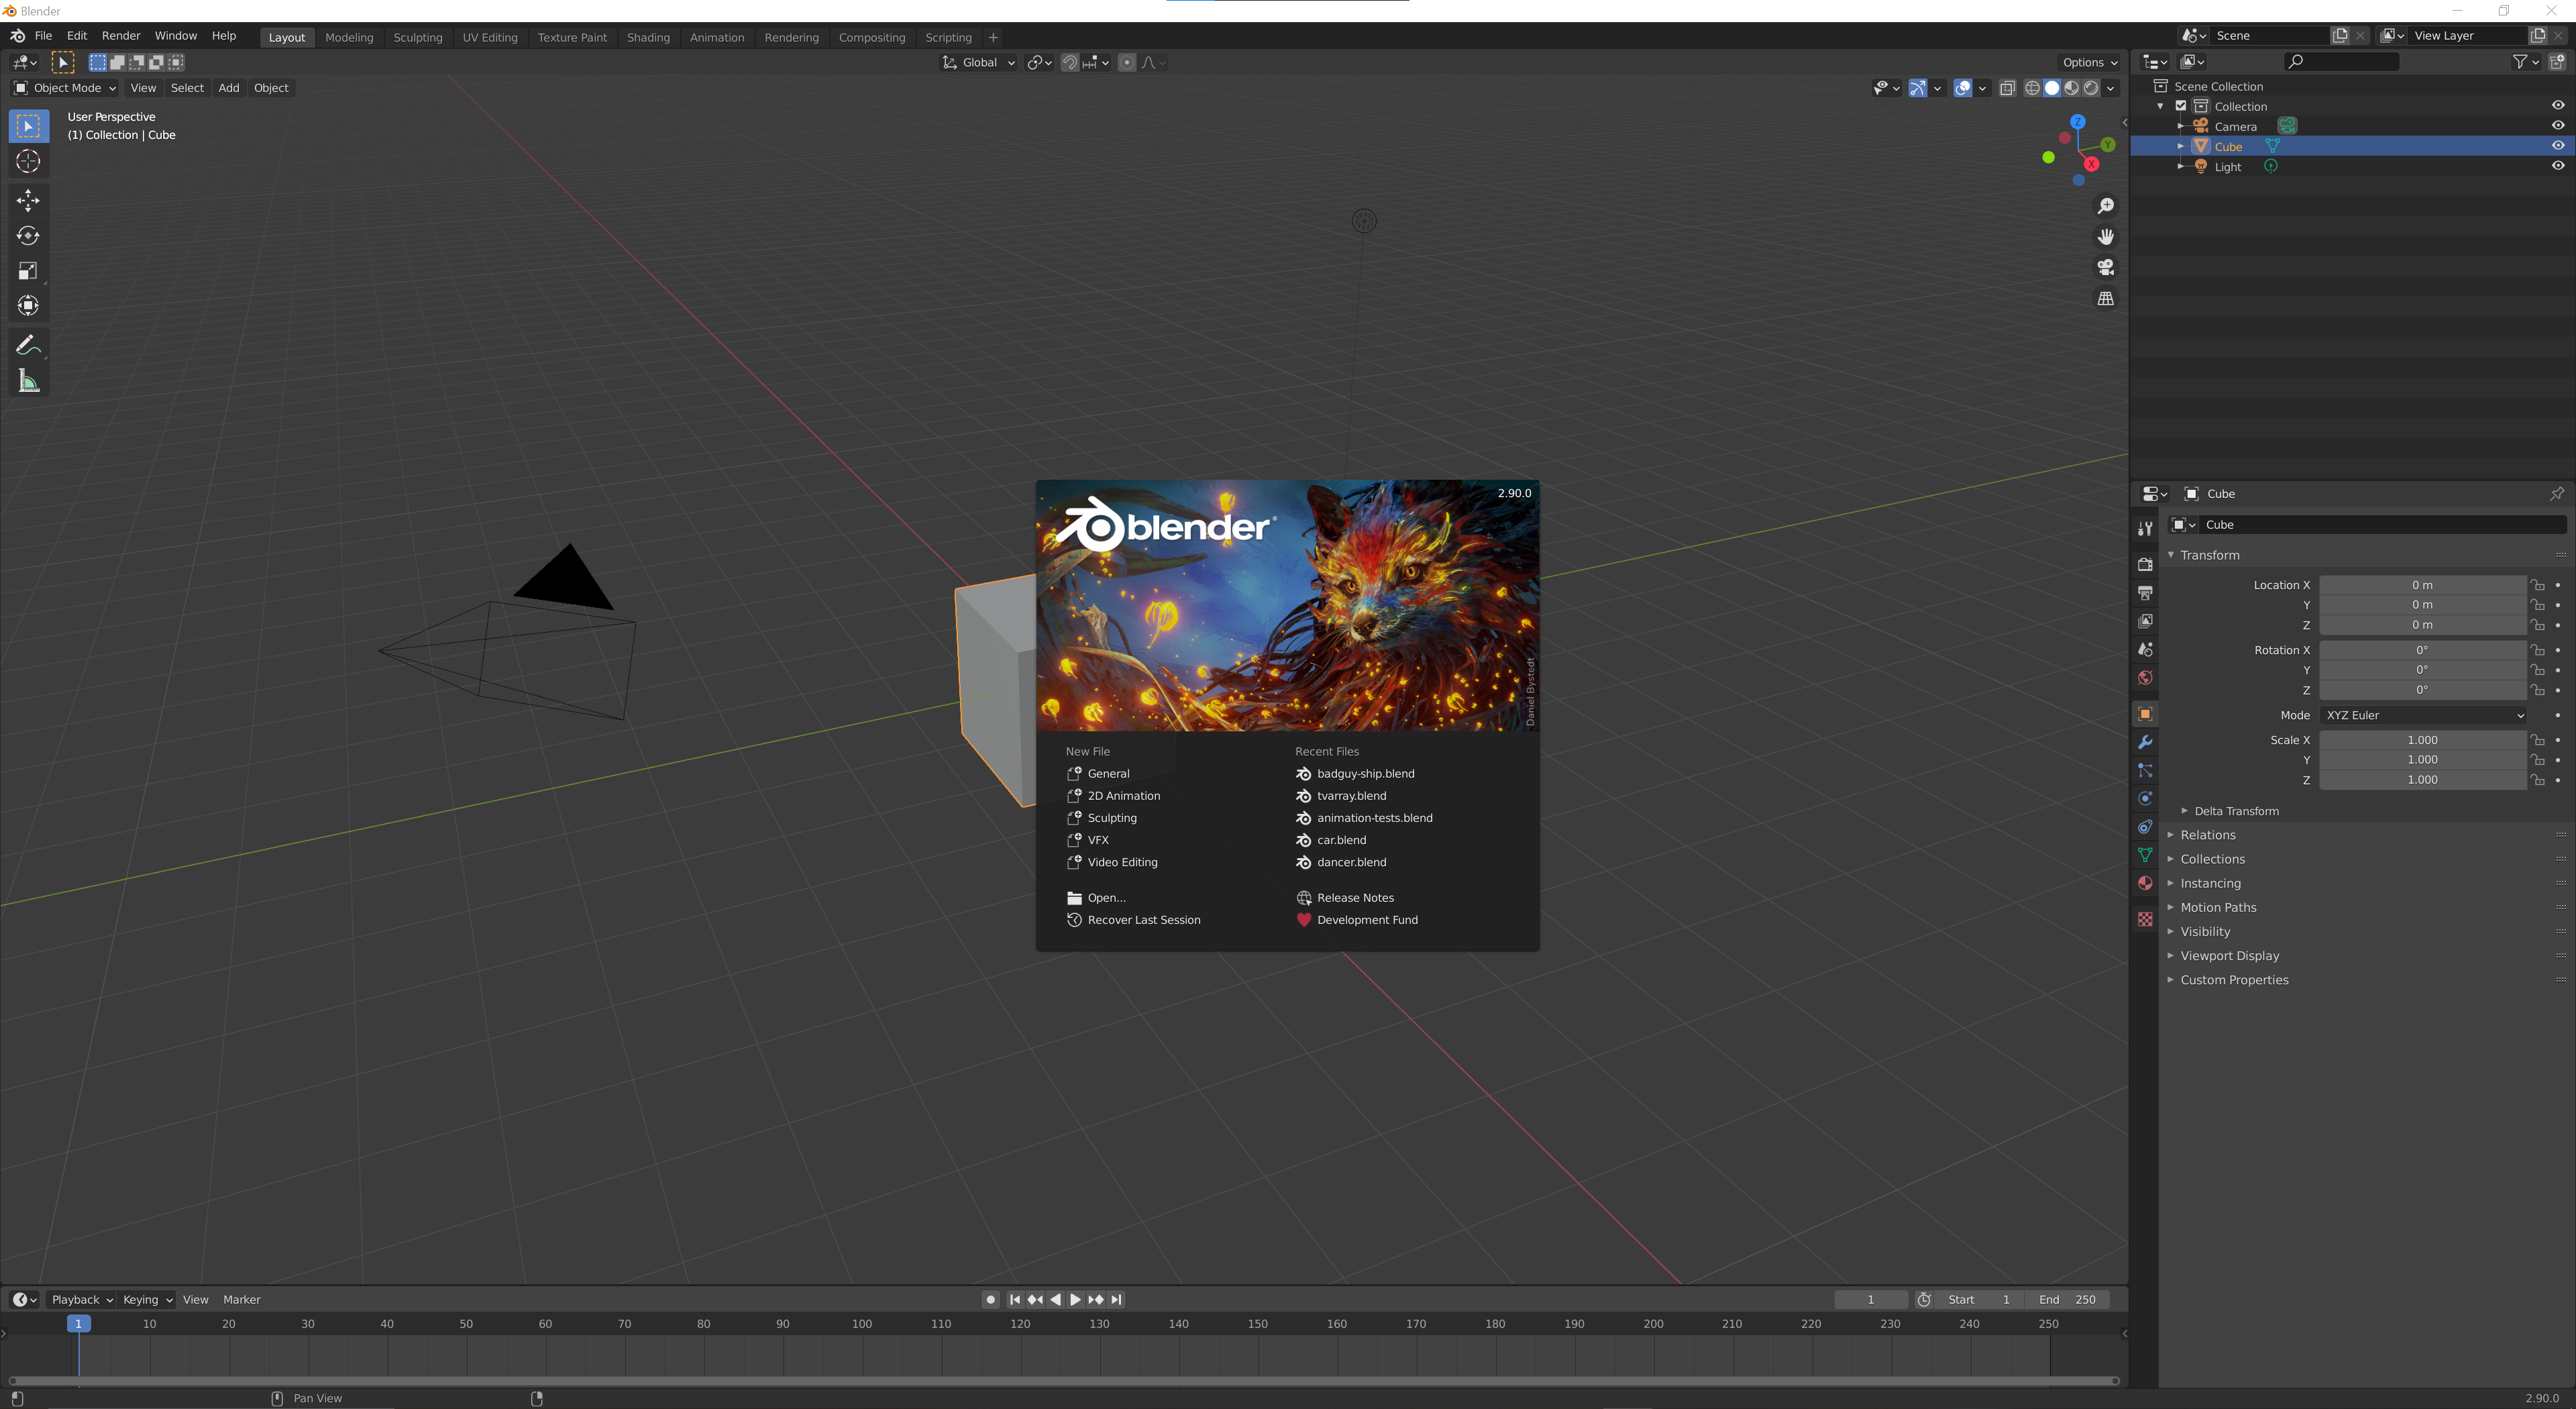
Step 2 Remove everything from the default Blender scene so that it is totally empty by deleting all of the objects. There should be nothing visible in the scene tree in the top right corner when you are done.
Step 3 Under the File menu in Blender find the Import menu, then select FBX (.fbx).

Step 4 Navigate to the extracted contents of the zip file from Mixamo. It will look something like this.
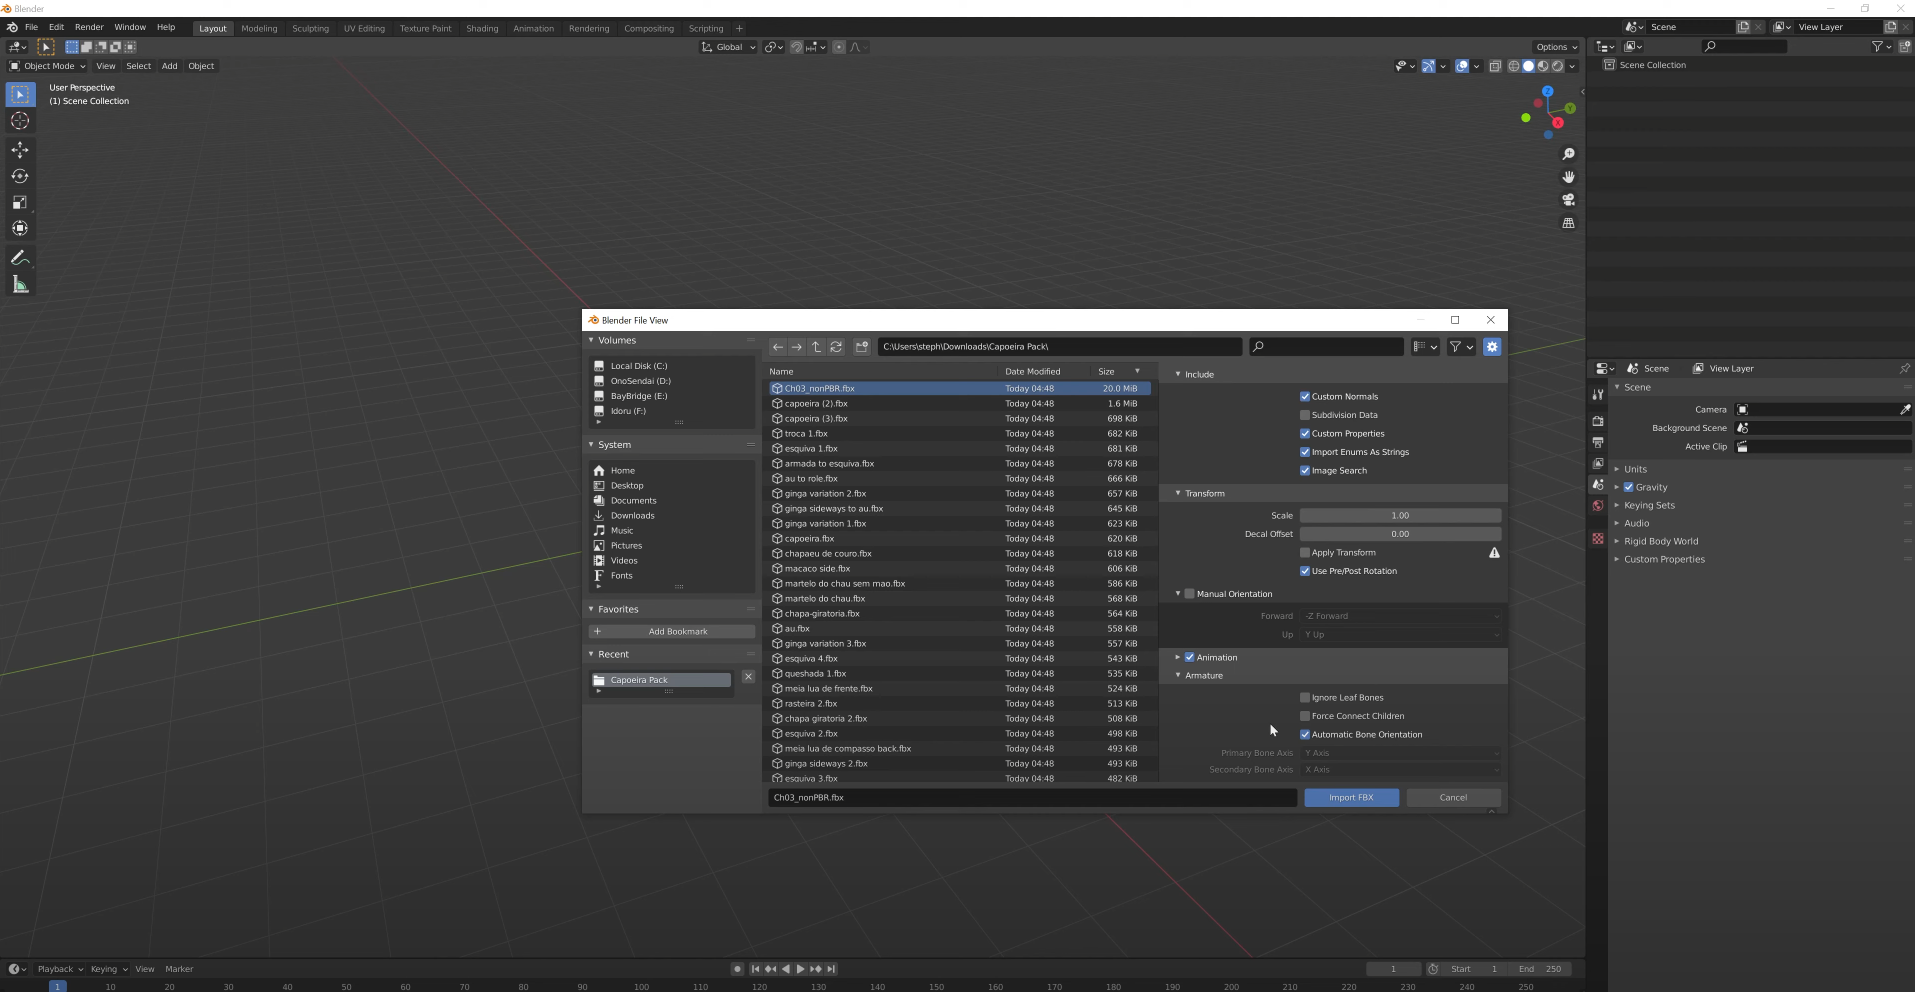
Step 5 Find the fbx file with the largest file size, this file contains the character geometry and the default T-POSE. If you used the Michelle character the name of this file should be Ch03_nonPBR.fbx The other files will contain all of the different animations in the Mixamo pack. We will get back to importing those later.
Step 6 Make sure you select the Automatic Bone Orientation option in the import dialog. You can see where this is in the screenshots. You should now see your character in Blender, but with a default T-Pose animation.
Importing Animation Data in Blender
The animations can be imported in exactly the same way as the model file, repeat the process from the previous step, but this time select the FBX file called armada.fbx This file contains only the animation data for one specific action. Since the name of this animation is armada we'll be using that name a lot from now on to name things.
Attaching an Animation to the Character
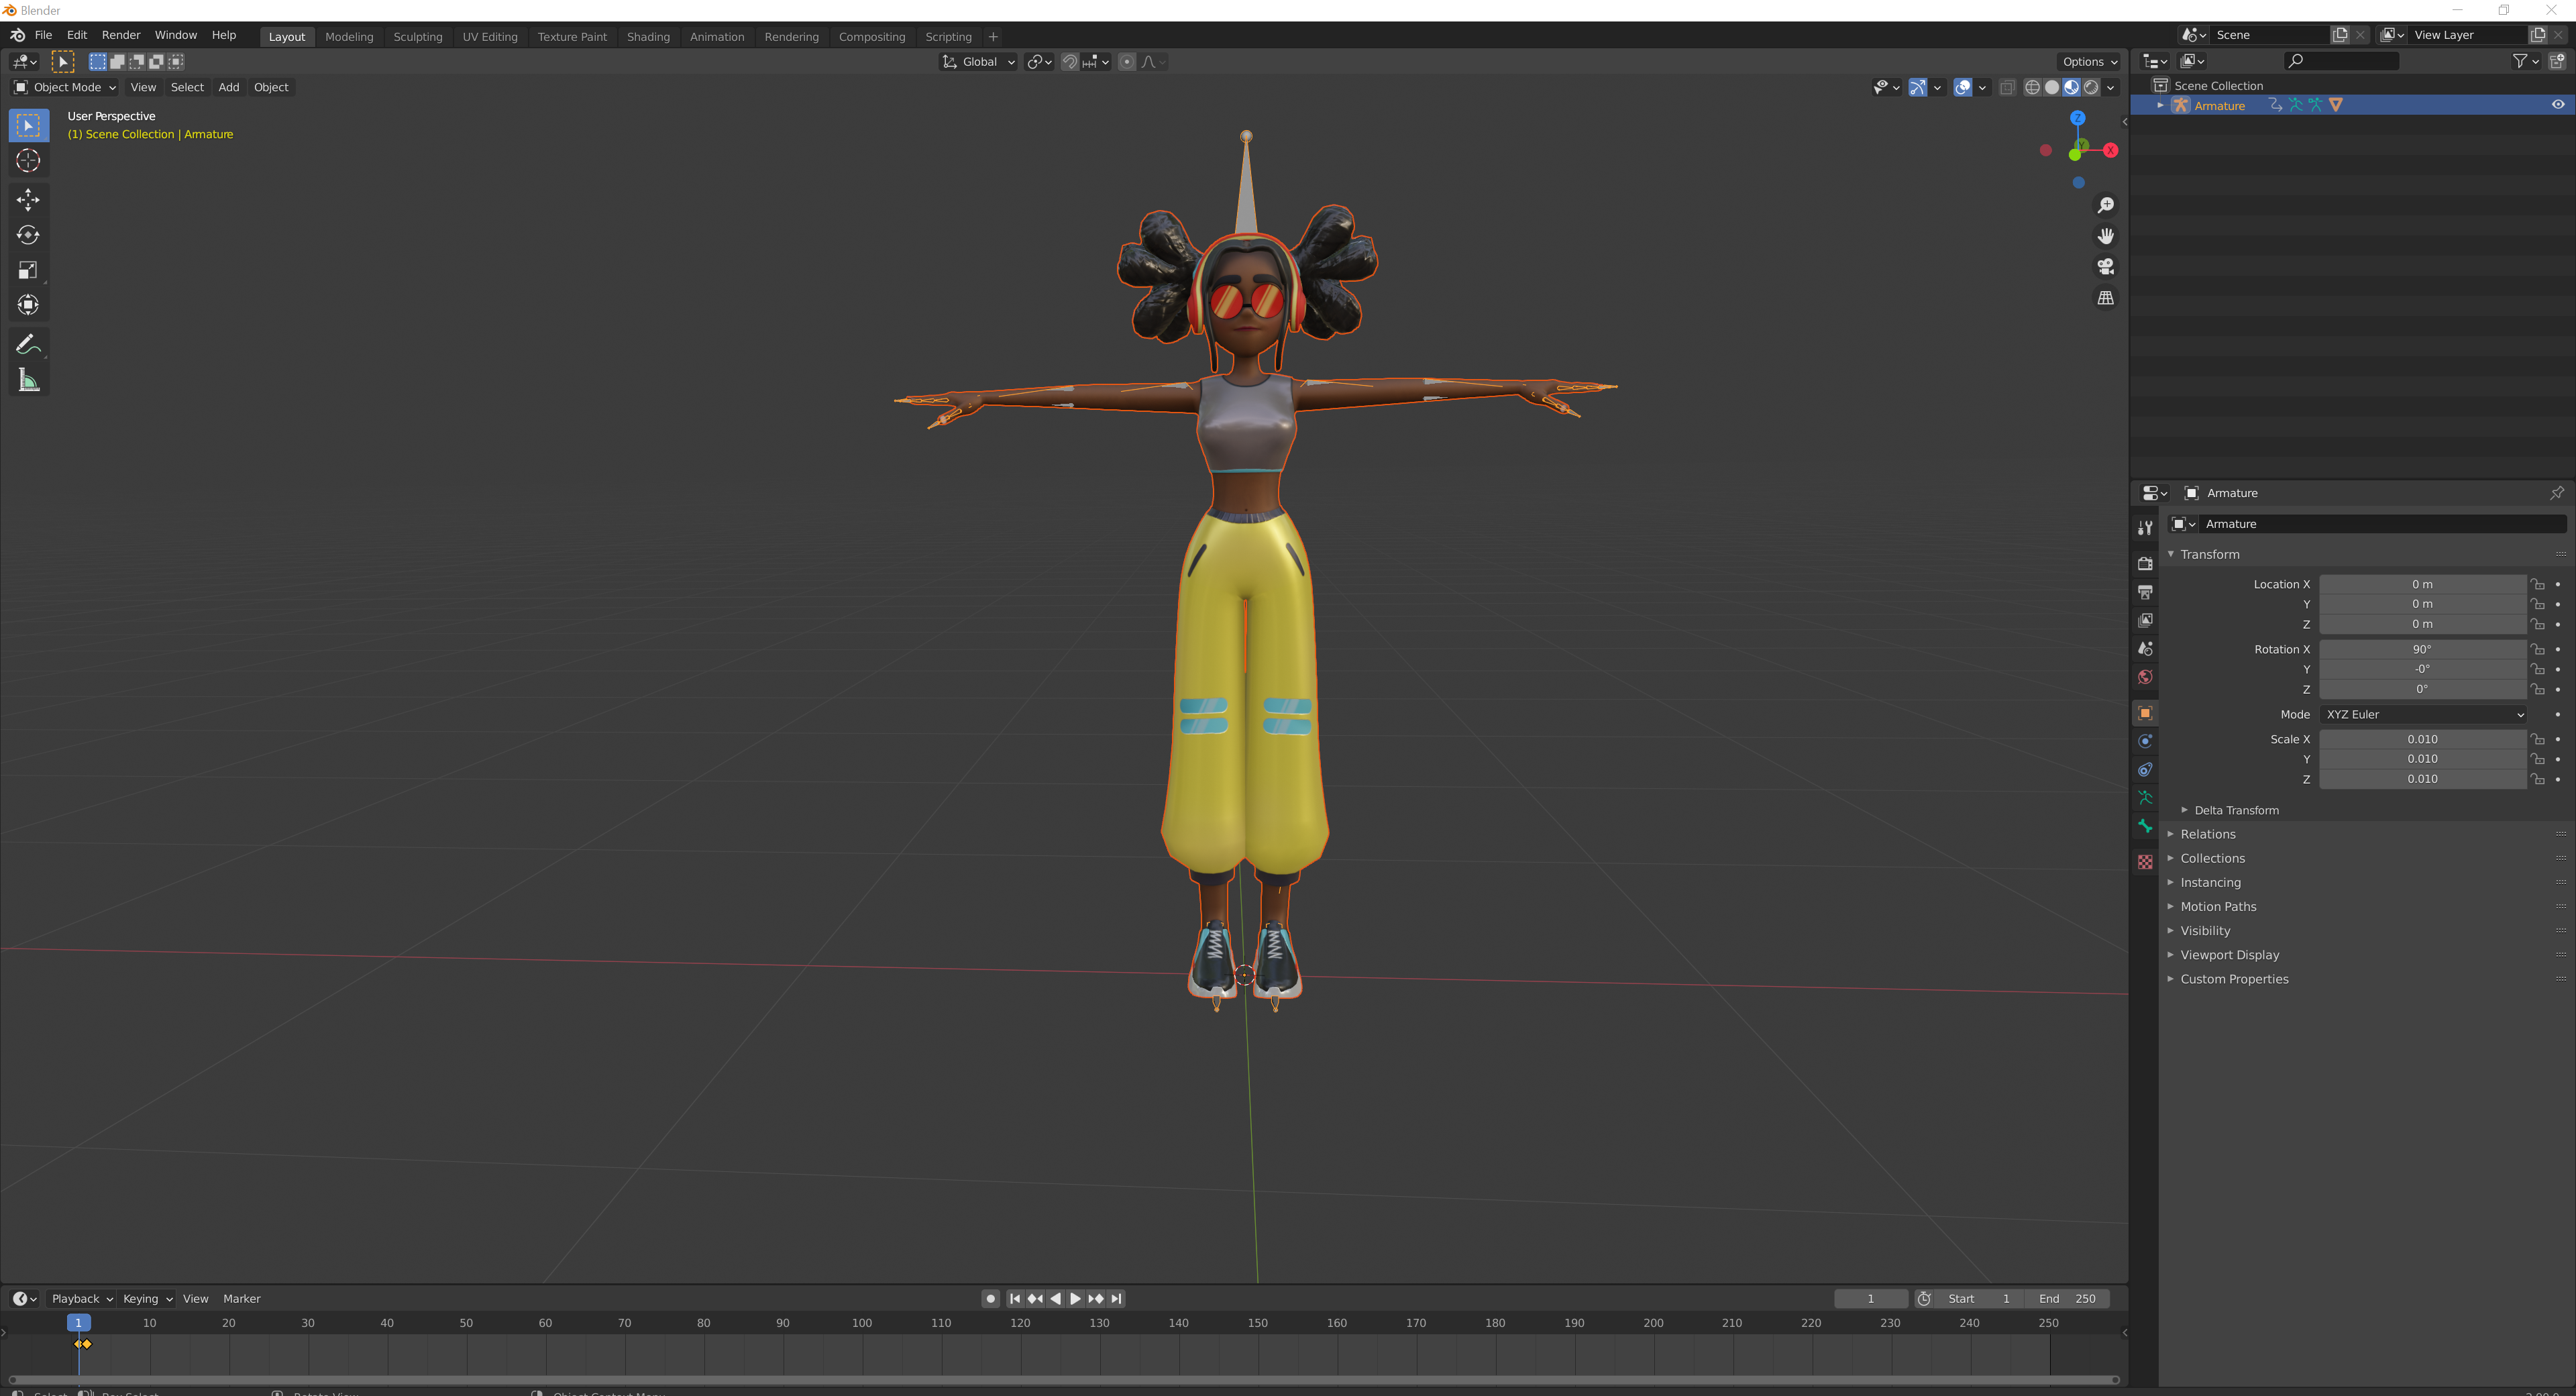
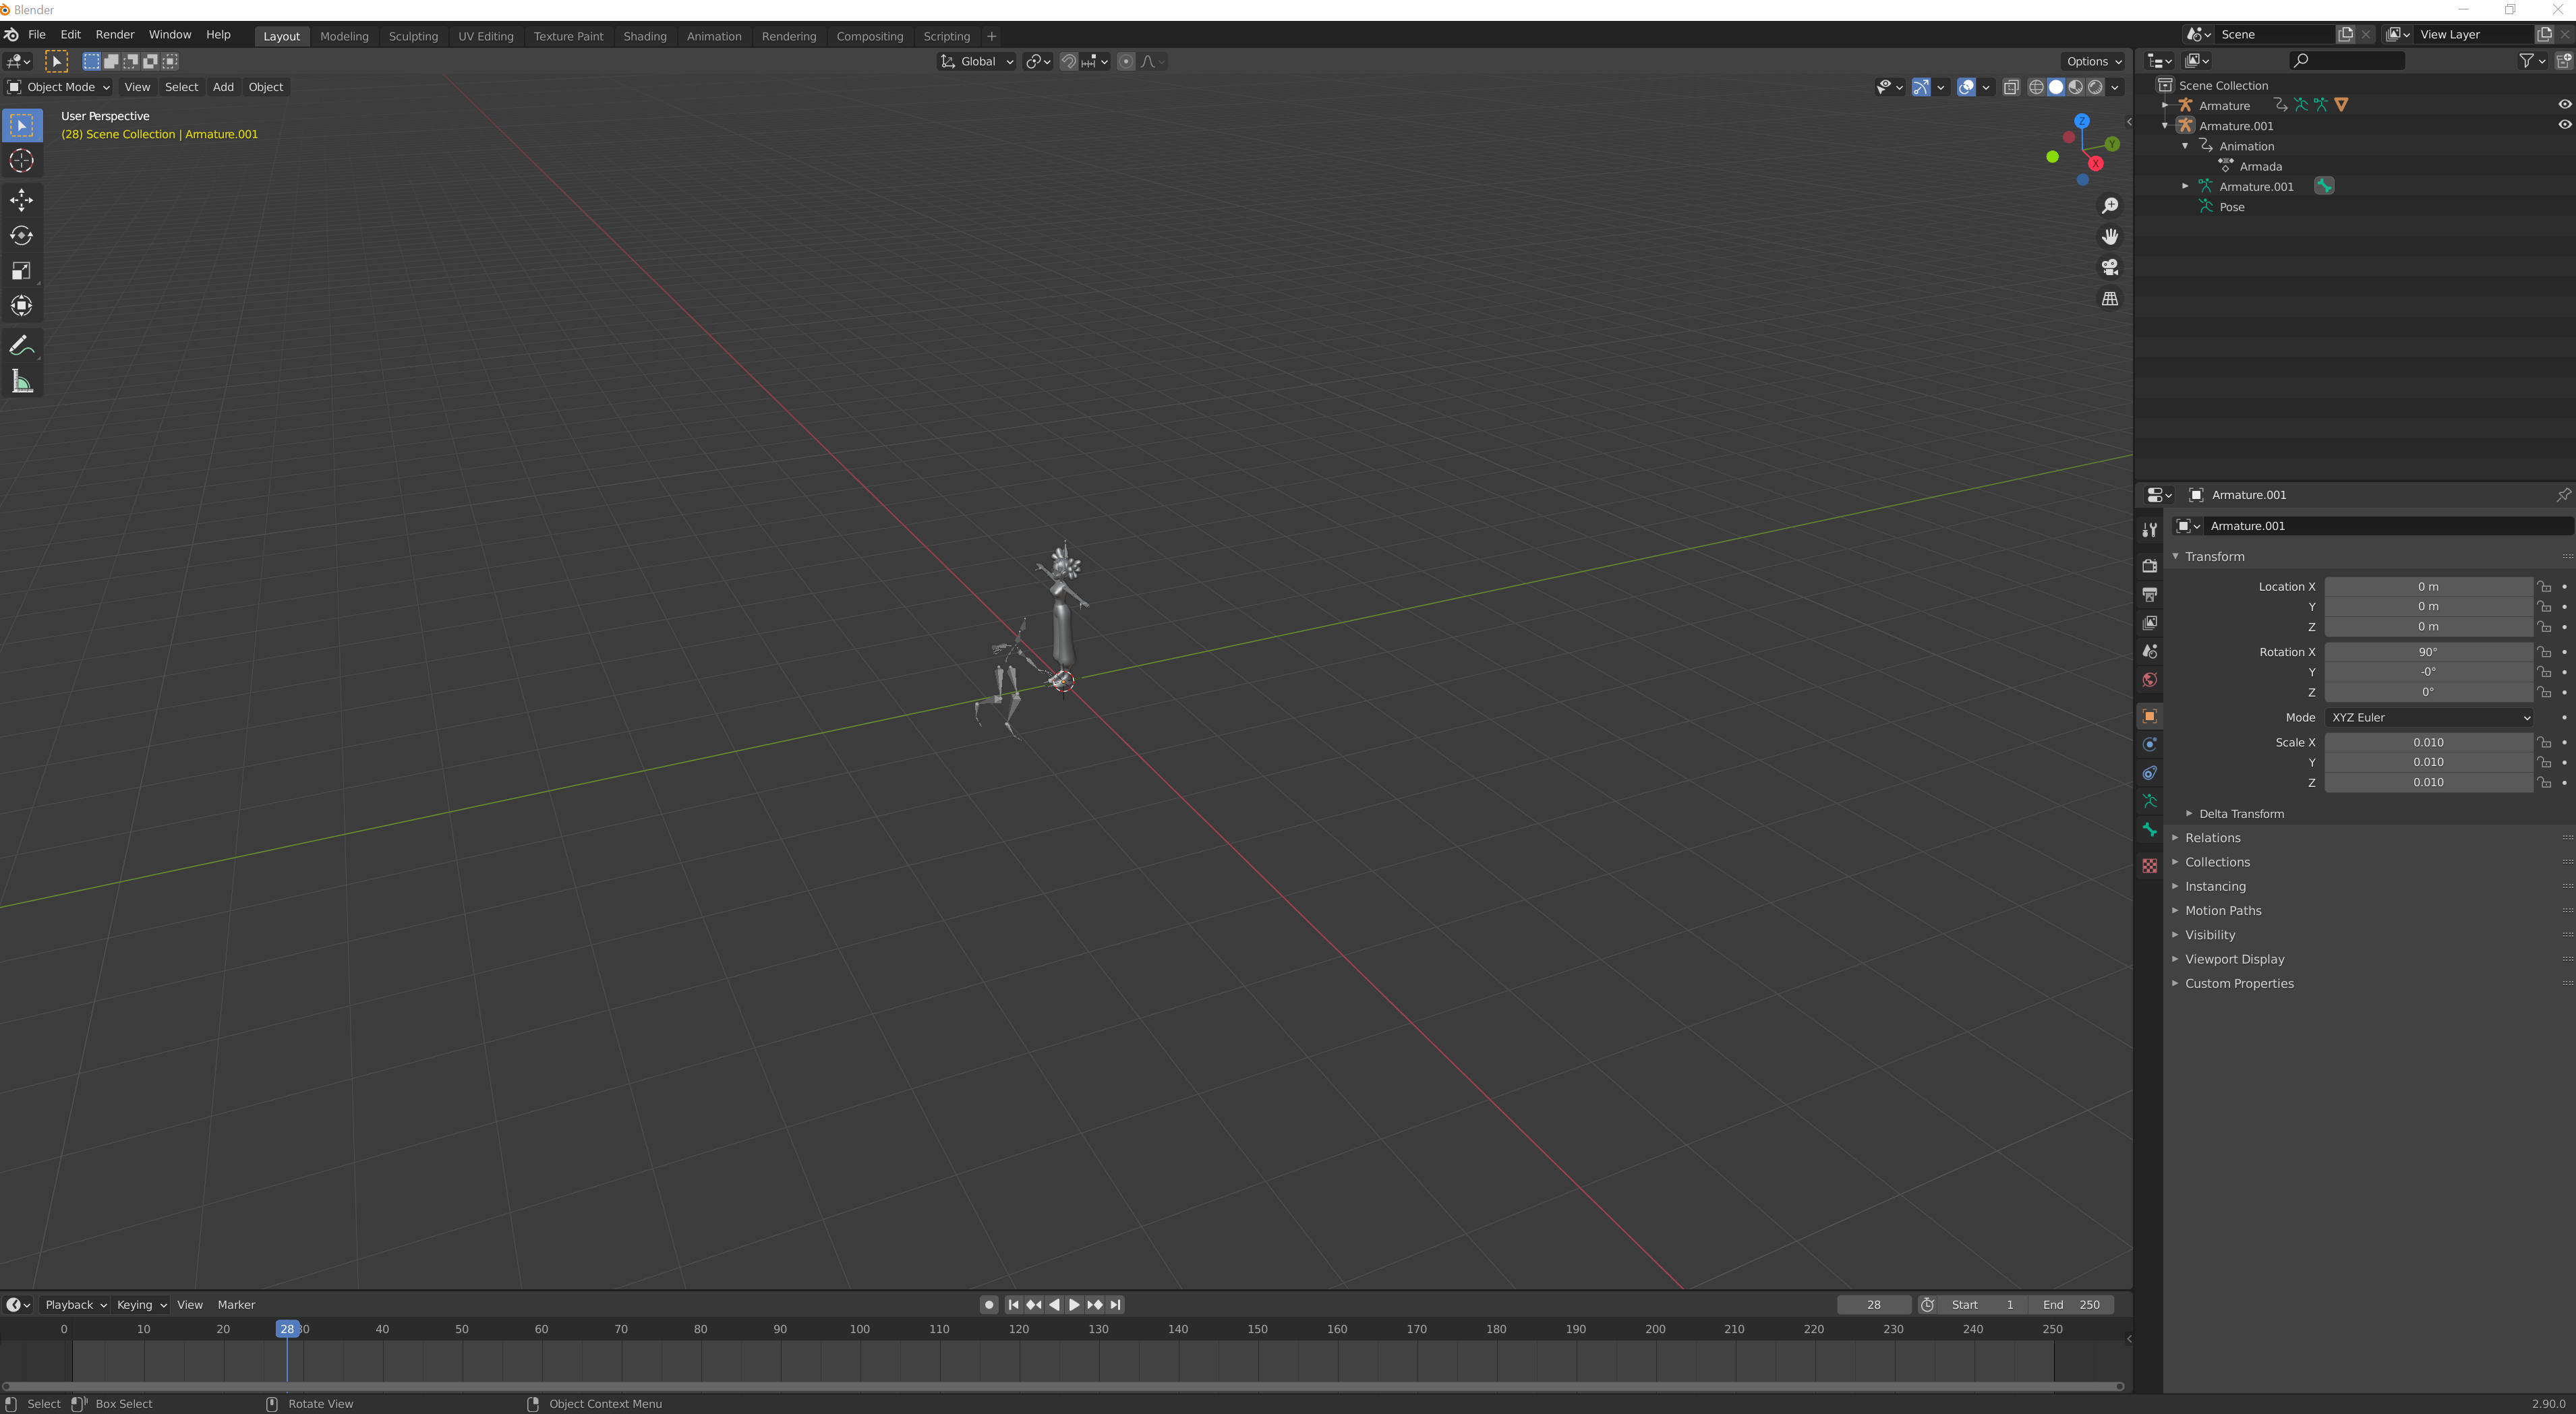
Now the animation is imported and exists in your Blender scene, but you still need to link it to the model. Before moving on make sure the contents of your 3D scene look like this. It should have two armatures. One with the T-Posed model called Armature, and one with the animation but no model attached called Armature.001. One note, I renamed the name of the animation under Armature.001 from the default to Armada this just makes it easier to find later. The default name will be some big long random name, I recommend changing it as well.
Step 1 With the first armature (the one with the model) selected in the viewport, switch to the Animation layout in Blender by selecting the Animation tab at the top of the viewport. You're view should change to look like the screenshot below.
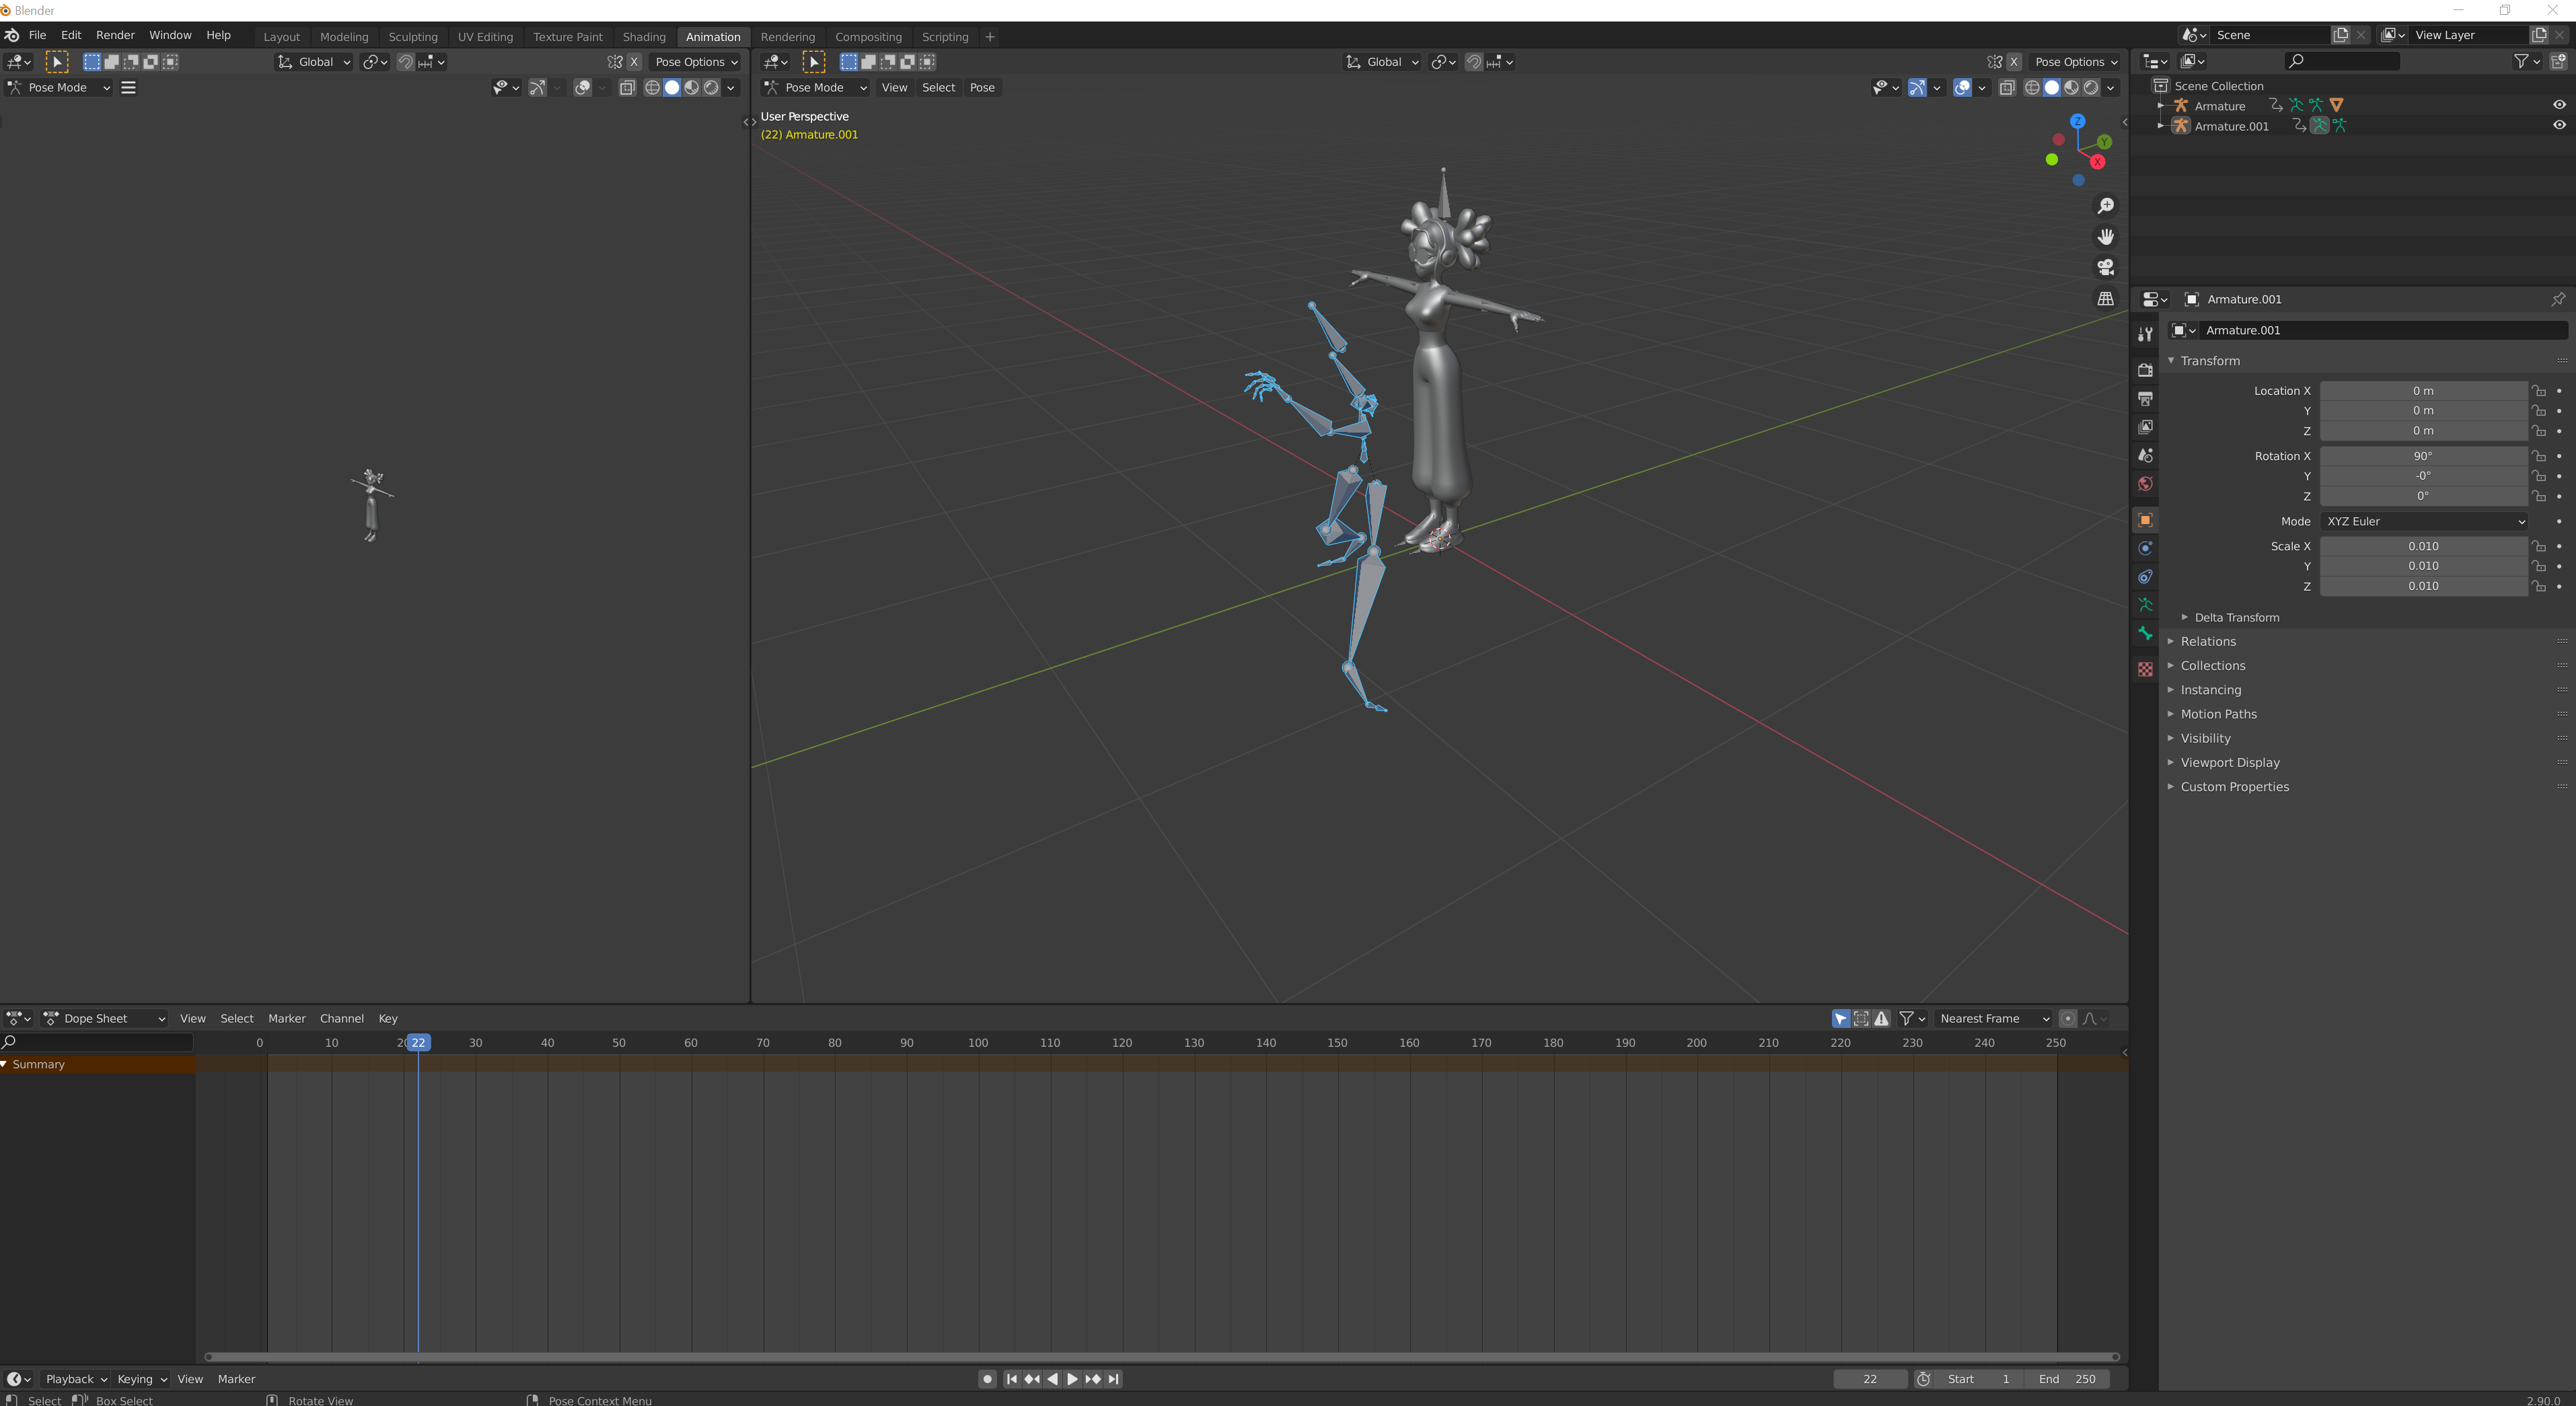
Step 2 Switch to the Action editor view in the Dope Sheet Panel (The Bottom One).
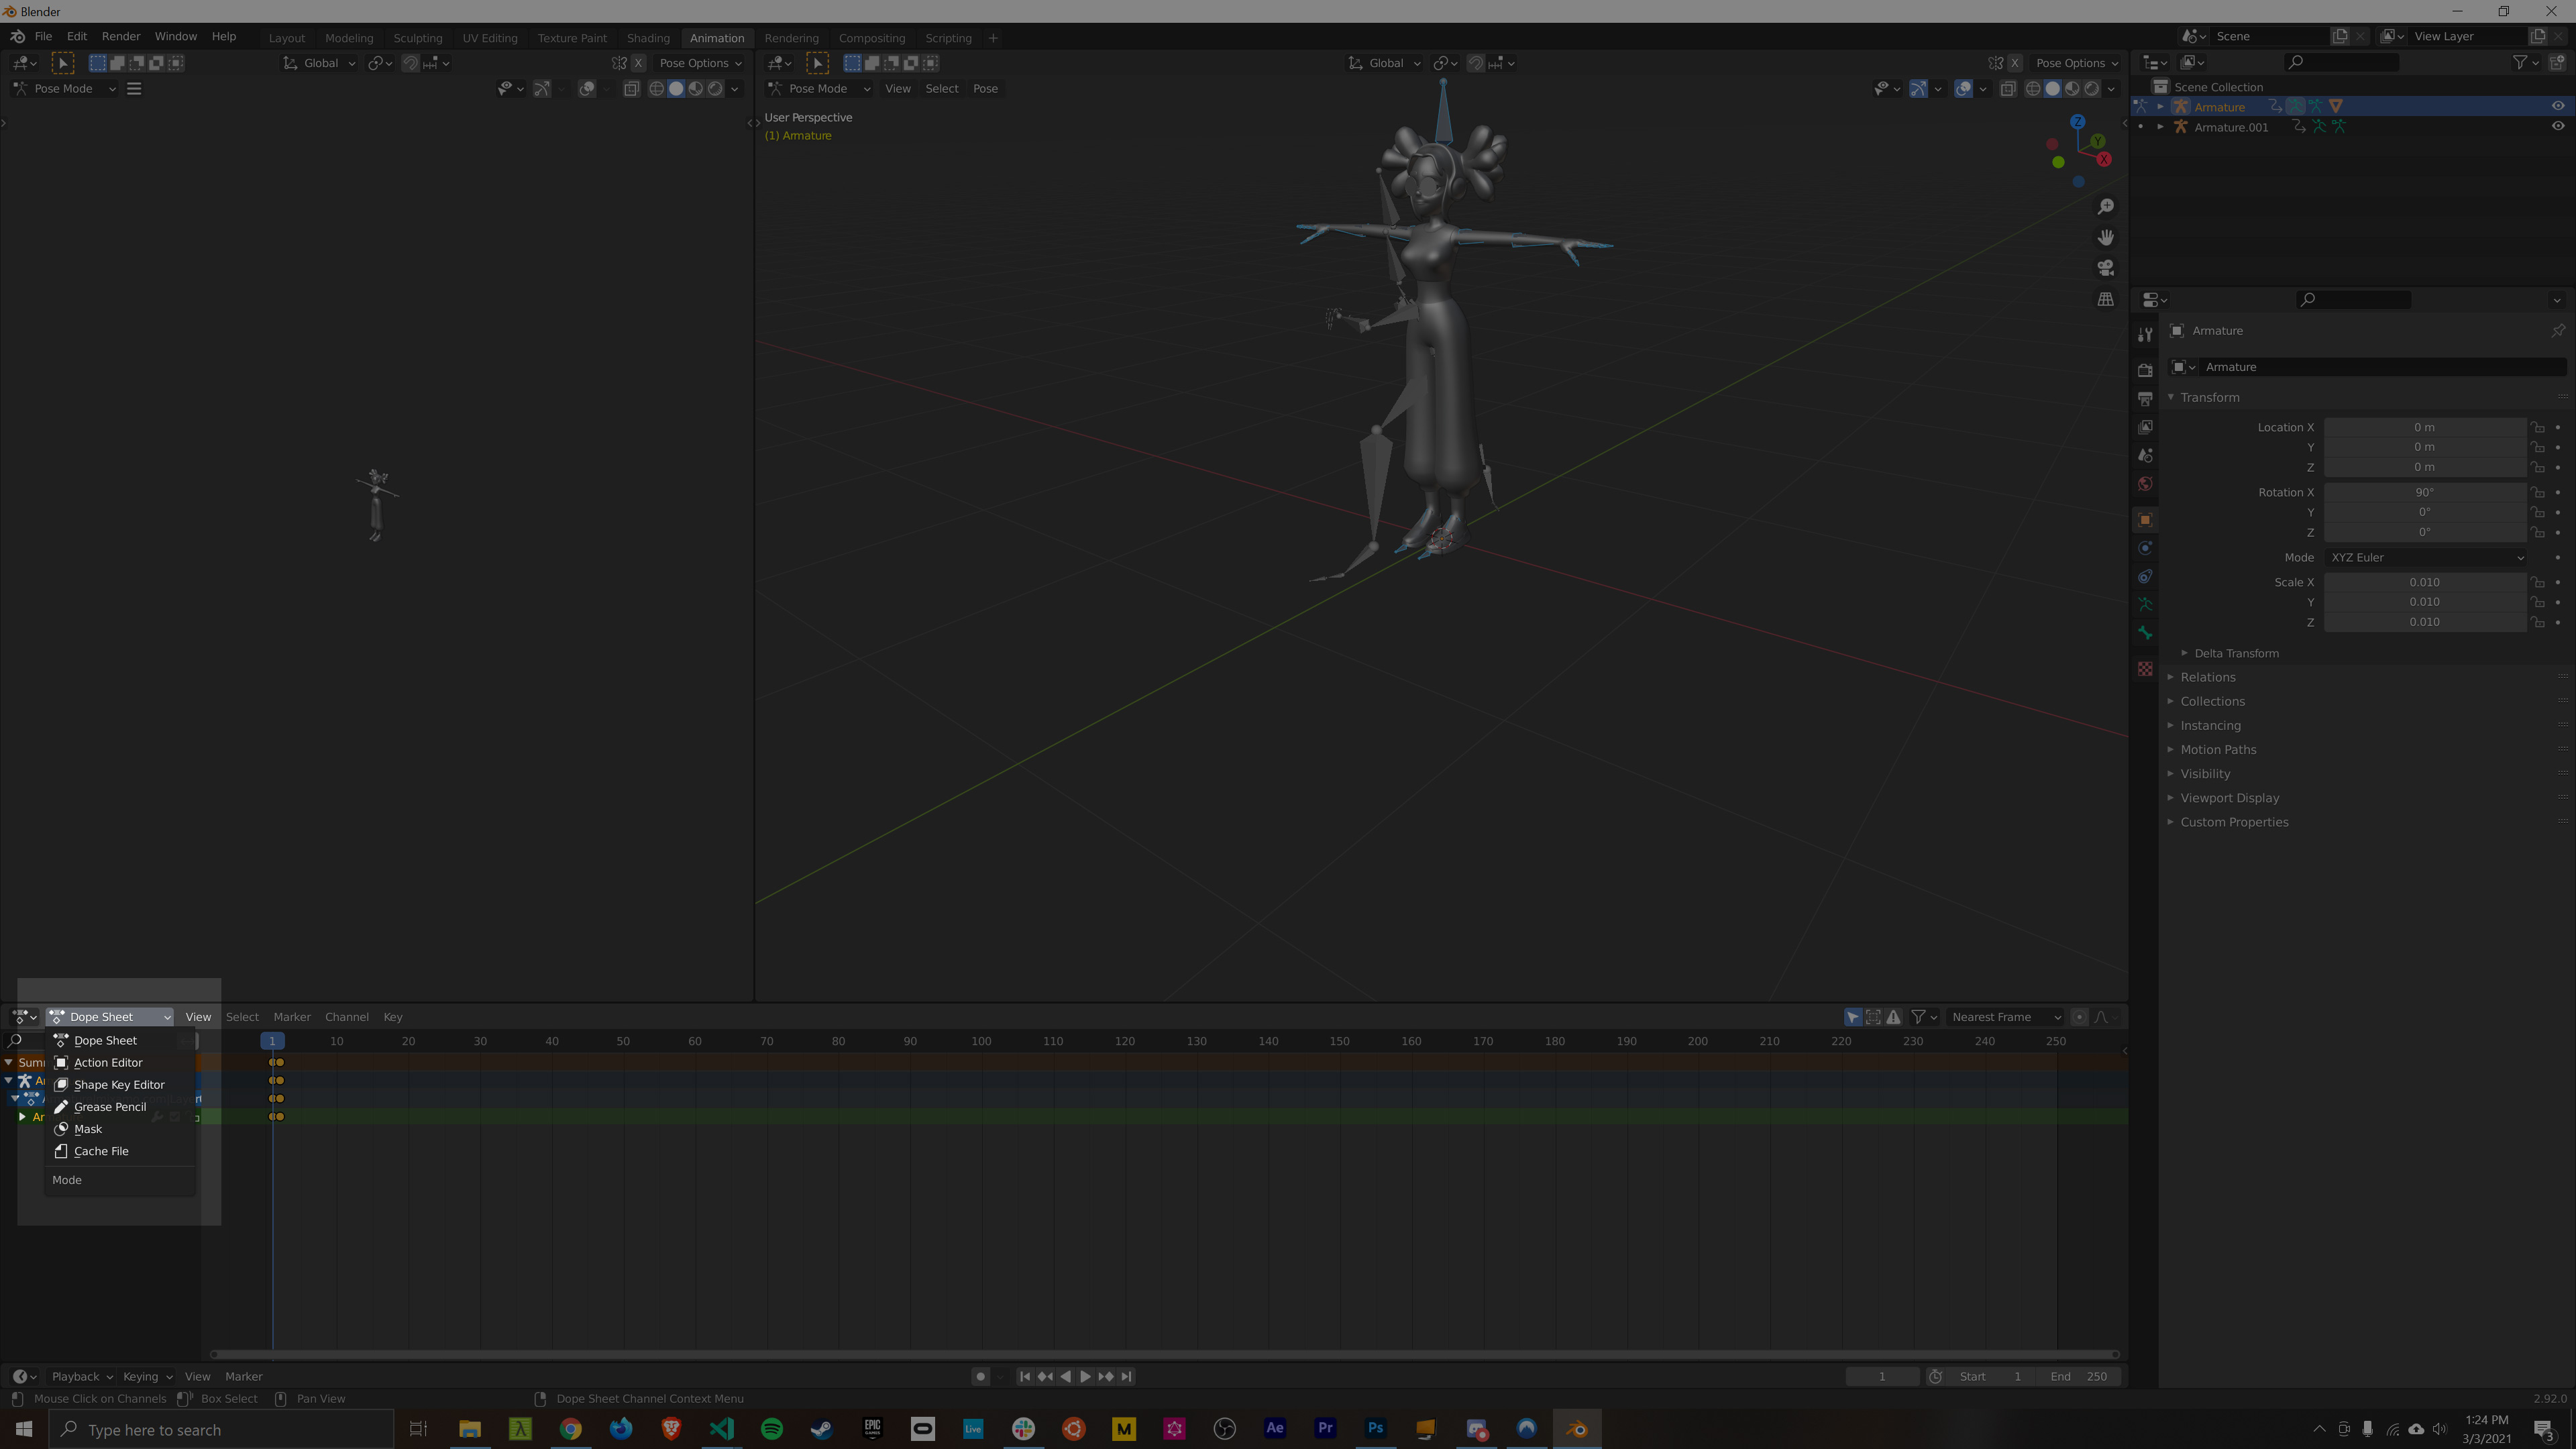
Step 3 Change the active Action to the second one imported, the one we renamed to Armada.
If this worked you should see your character instantly change its pose to the beginning of the kick animation. To try it out hit the play button on the Dope Sheet to see the animation play. If for some reason it doesn't work you might need to start over with a fresh Blender and reimport your .fbx files. Make sure you have the Automatic Bone Orientation option checked.
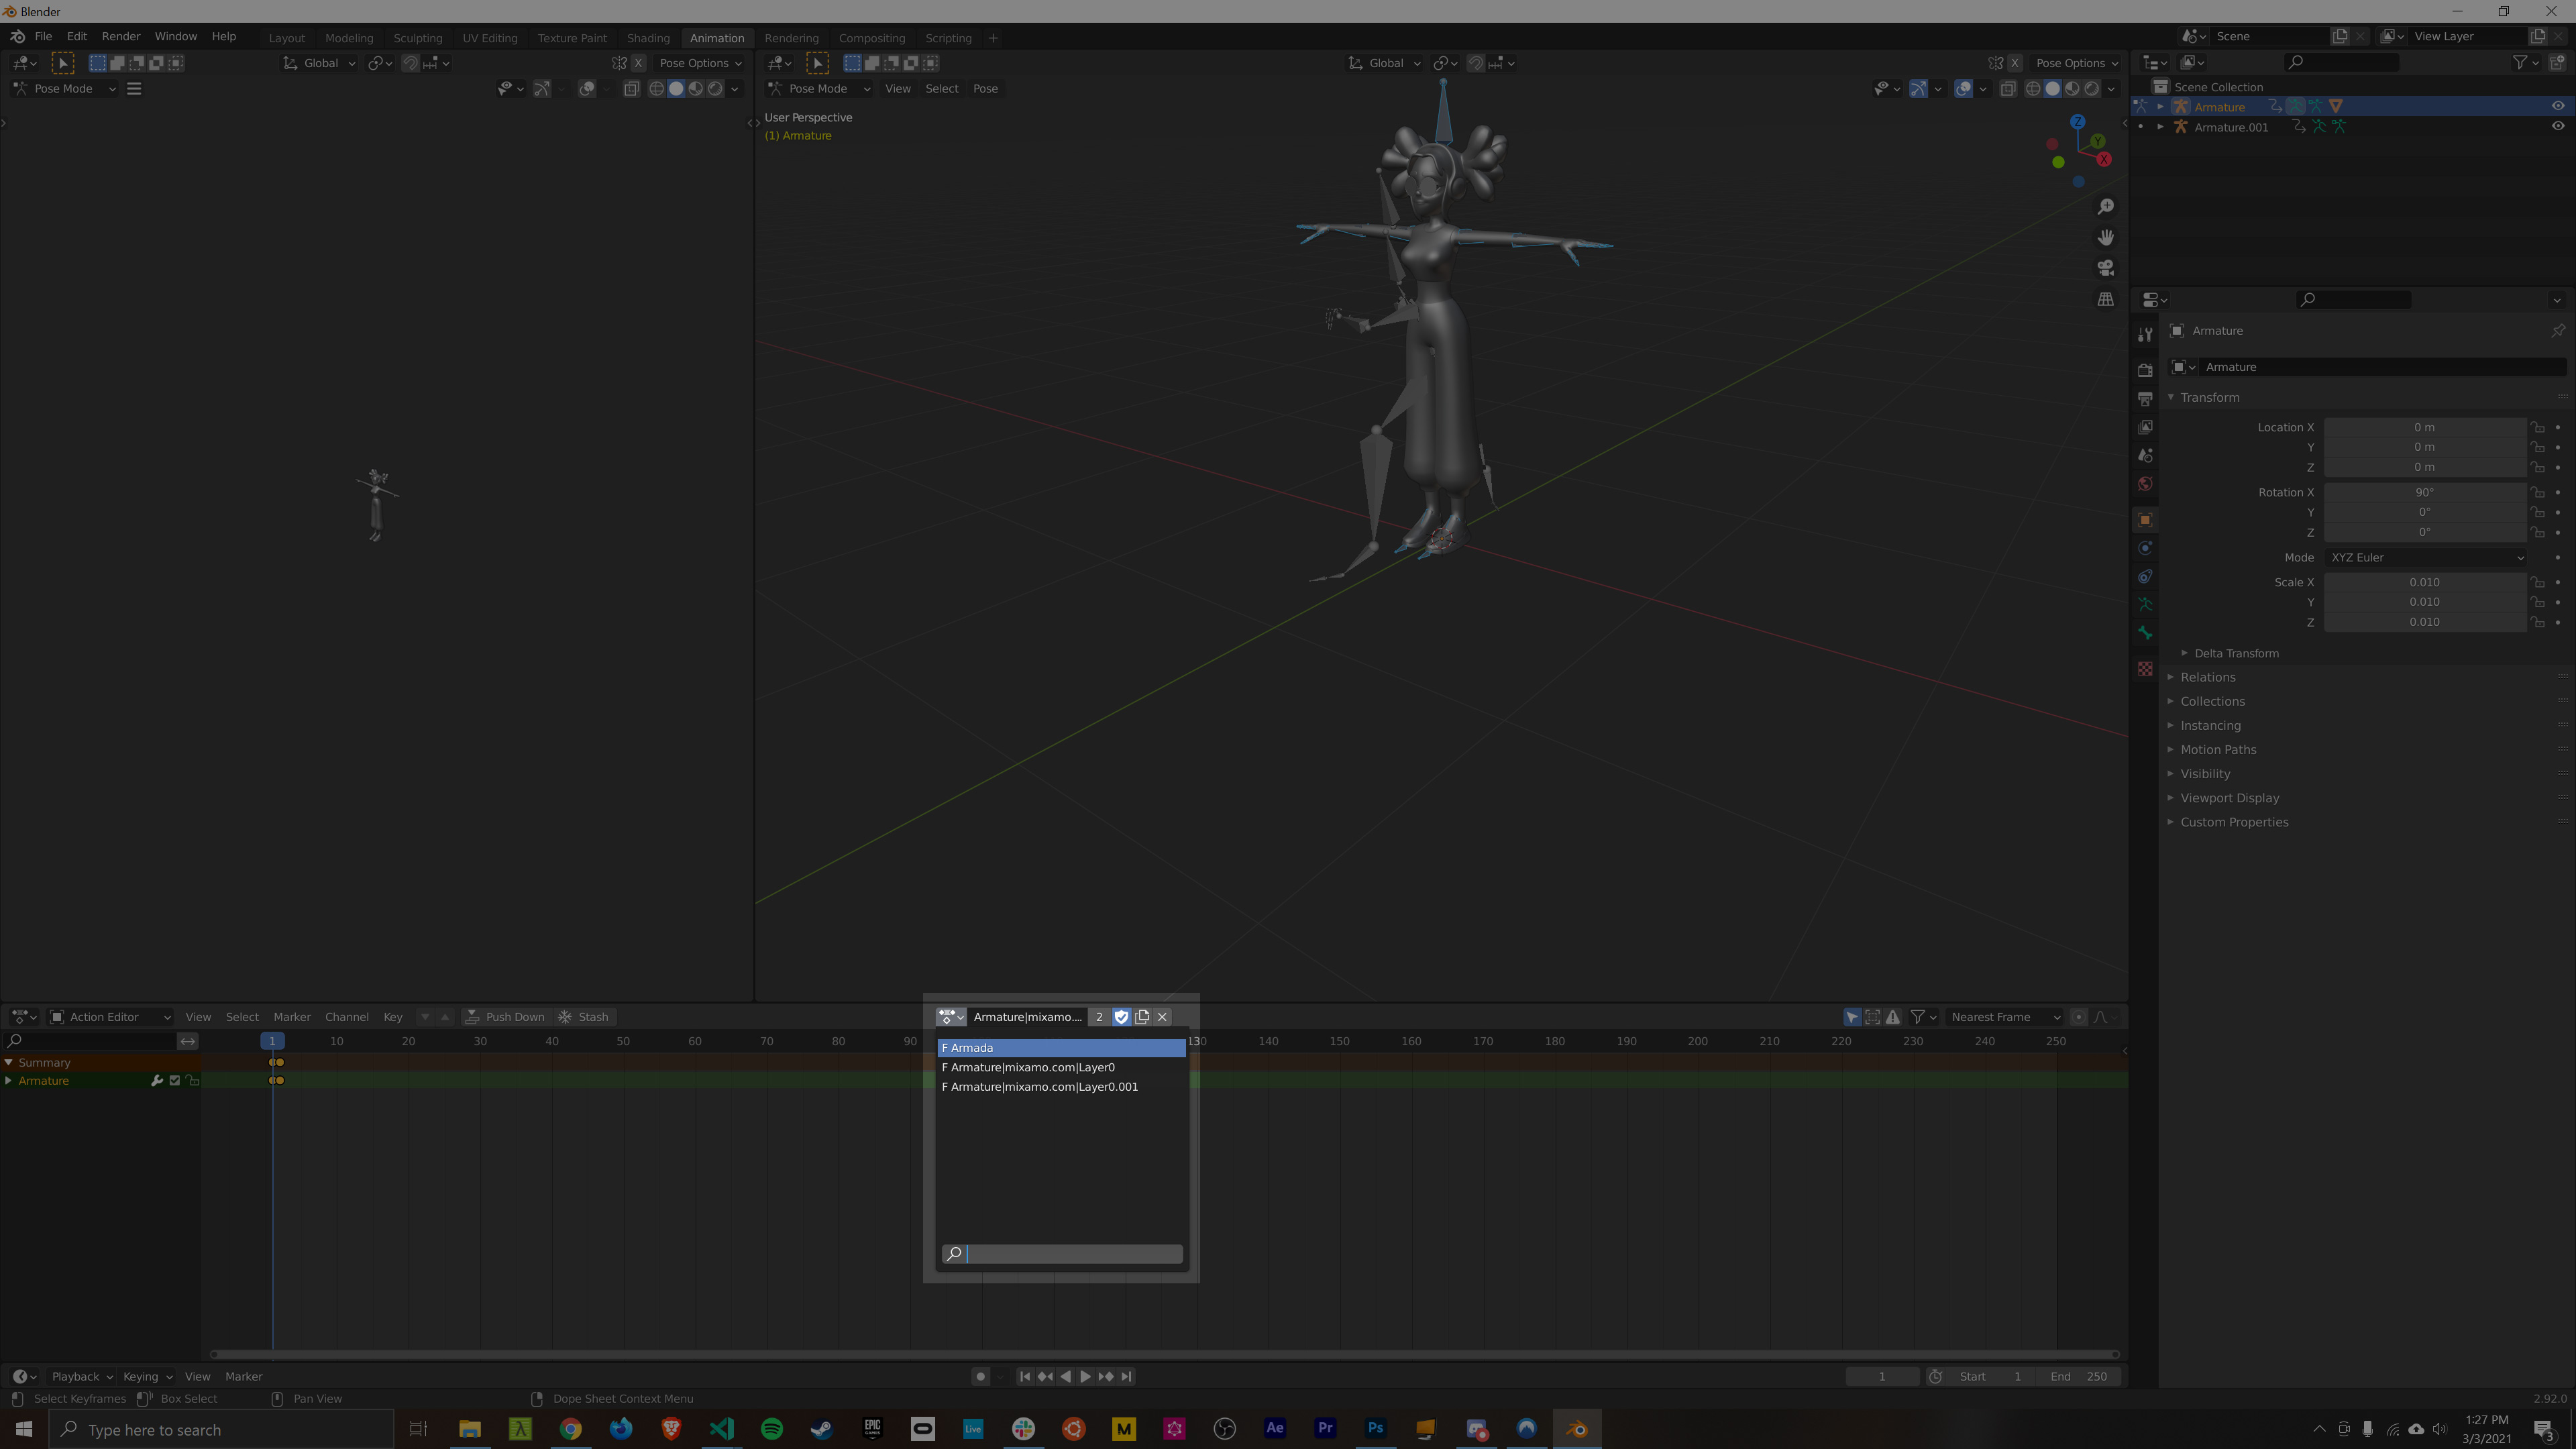
Step 3 Push the Stash Button in the Dope Sheet Action Editor to make sure the animation stays attached to the model. After you hit stash the animation will be stored with an attachment to the working object so you can find it later, you could now import another model and repeat the steps up to this point to attach another animation action.

Step 4 Finally delete the second armature, the one with just the animation. NOT the one with the model on it. This is just to clean up the scene before exporting so there are no extra objects in the export file. Having these can kind of confuse GLFTJSX sometimes so it's a good thing to do.
Export the Model as a GLTF File
Now it's time to export from Blender to a .gltf file that we can use in react-three-fiber. GLTF is the standard file format for any 3d data you want to export to WebGl.
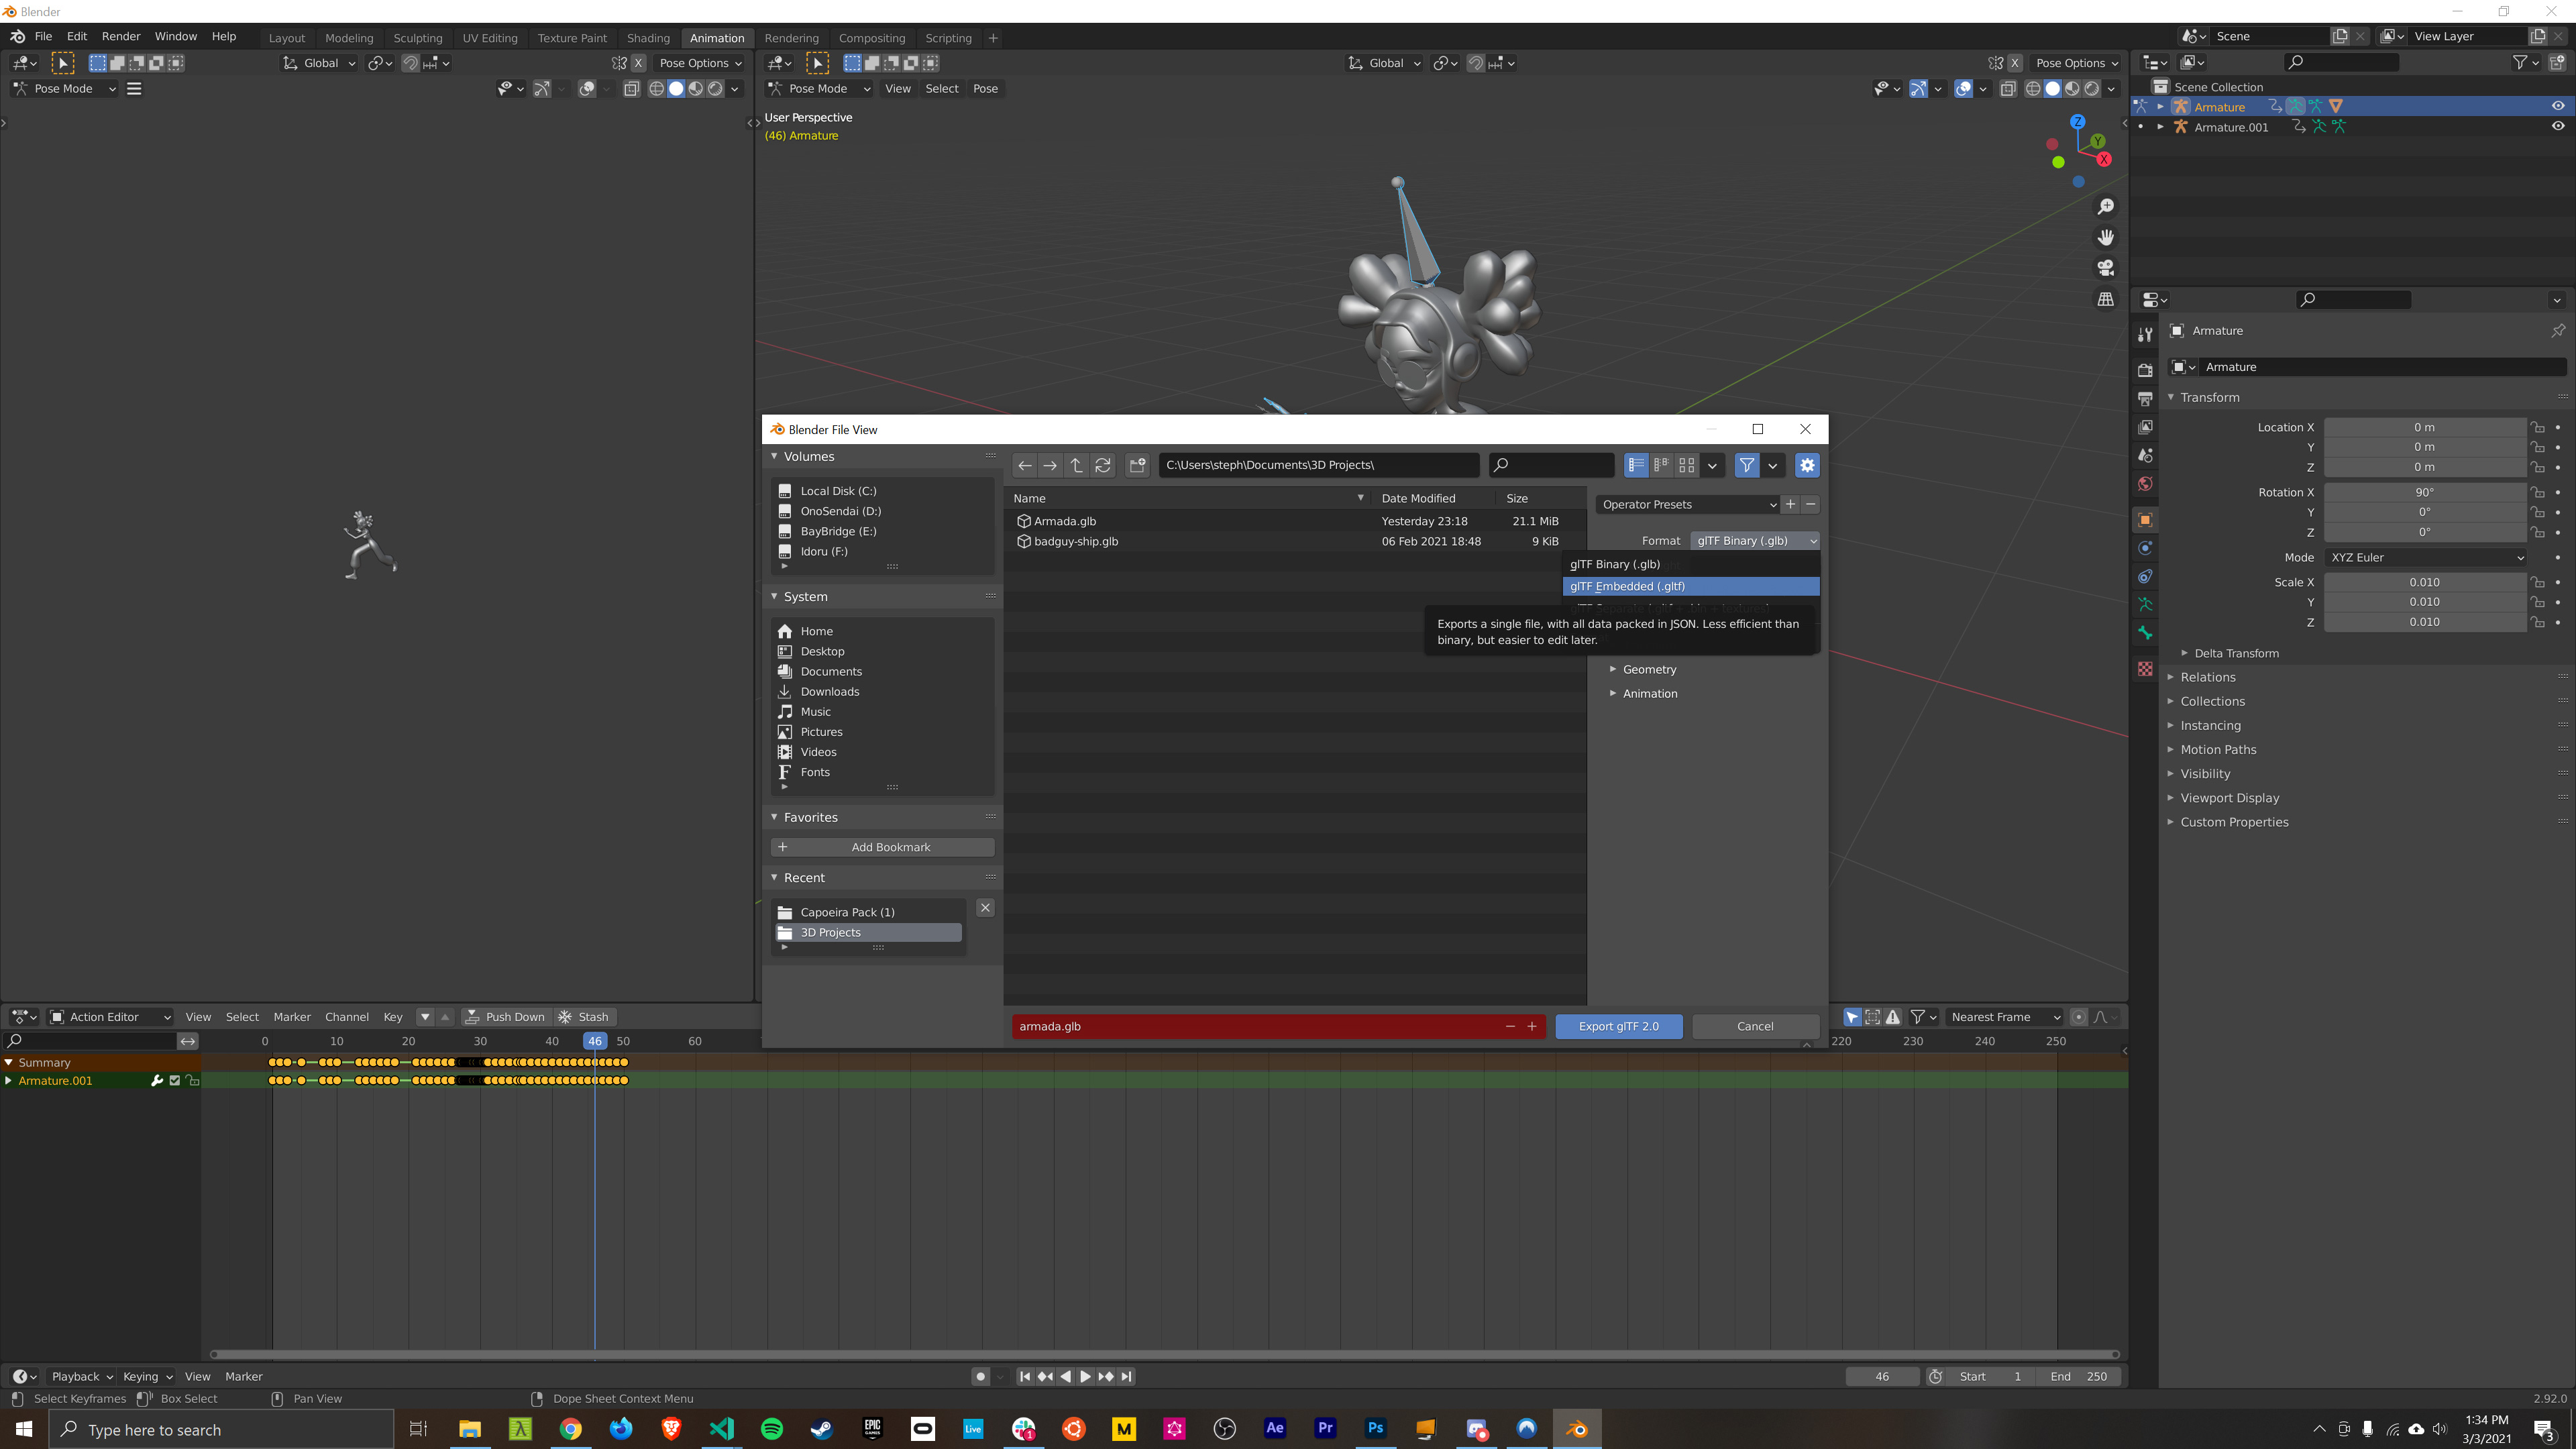
Step 1 Export as a .gltf file. The .gltf format will remain human readable after export. This can be helpful sometimes if you want to see the structure of the exported file. You could also export as a .glb which just stands for GLTF binary. It's a more space efficient file format for representing a GLTF but once you export you can no longer easily open and inspect the contents of the file.
It doesn't matter what you name the file, but I'm going to call it armada.gltf after the name of the animation we're exporting. You'll see this name referenced through out the rest of the tutorial.
Generate a React Component Wrapper for the .gltf file by using GLTFJSX
When we go to use the exported gltf file in react we will need to access certain parts of the exported scene, for example we need to extract the geometry, the armature, and the animations.
You can save a lot of time by not doing it manually and instead by using a helpful tool created by the react-three-fiber team called GLFTJSX. This is a command line tool that you can run with a gltf or glb file as input and it will create a nicely structured react component wrapper as output.
Step 1 Install GLTFJSX globally with npm so you can use it on the Command line.
npm i -g gltfjsx
Step 2 Run GLTFJSX with the armada.gltf file as input. Make sure you run the command in the same directory as the .gltf file.
gltfjsx armada.gltf
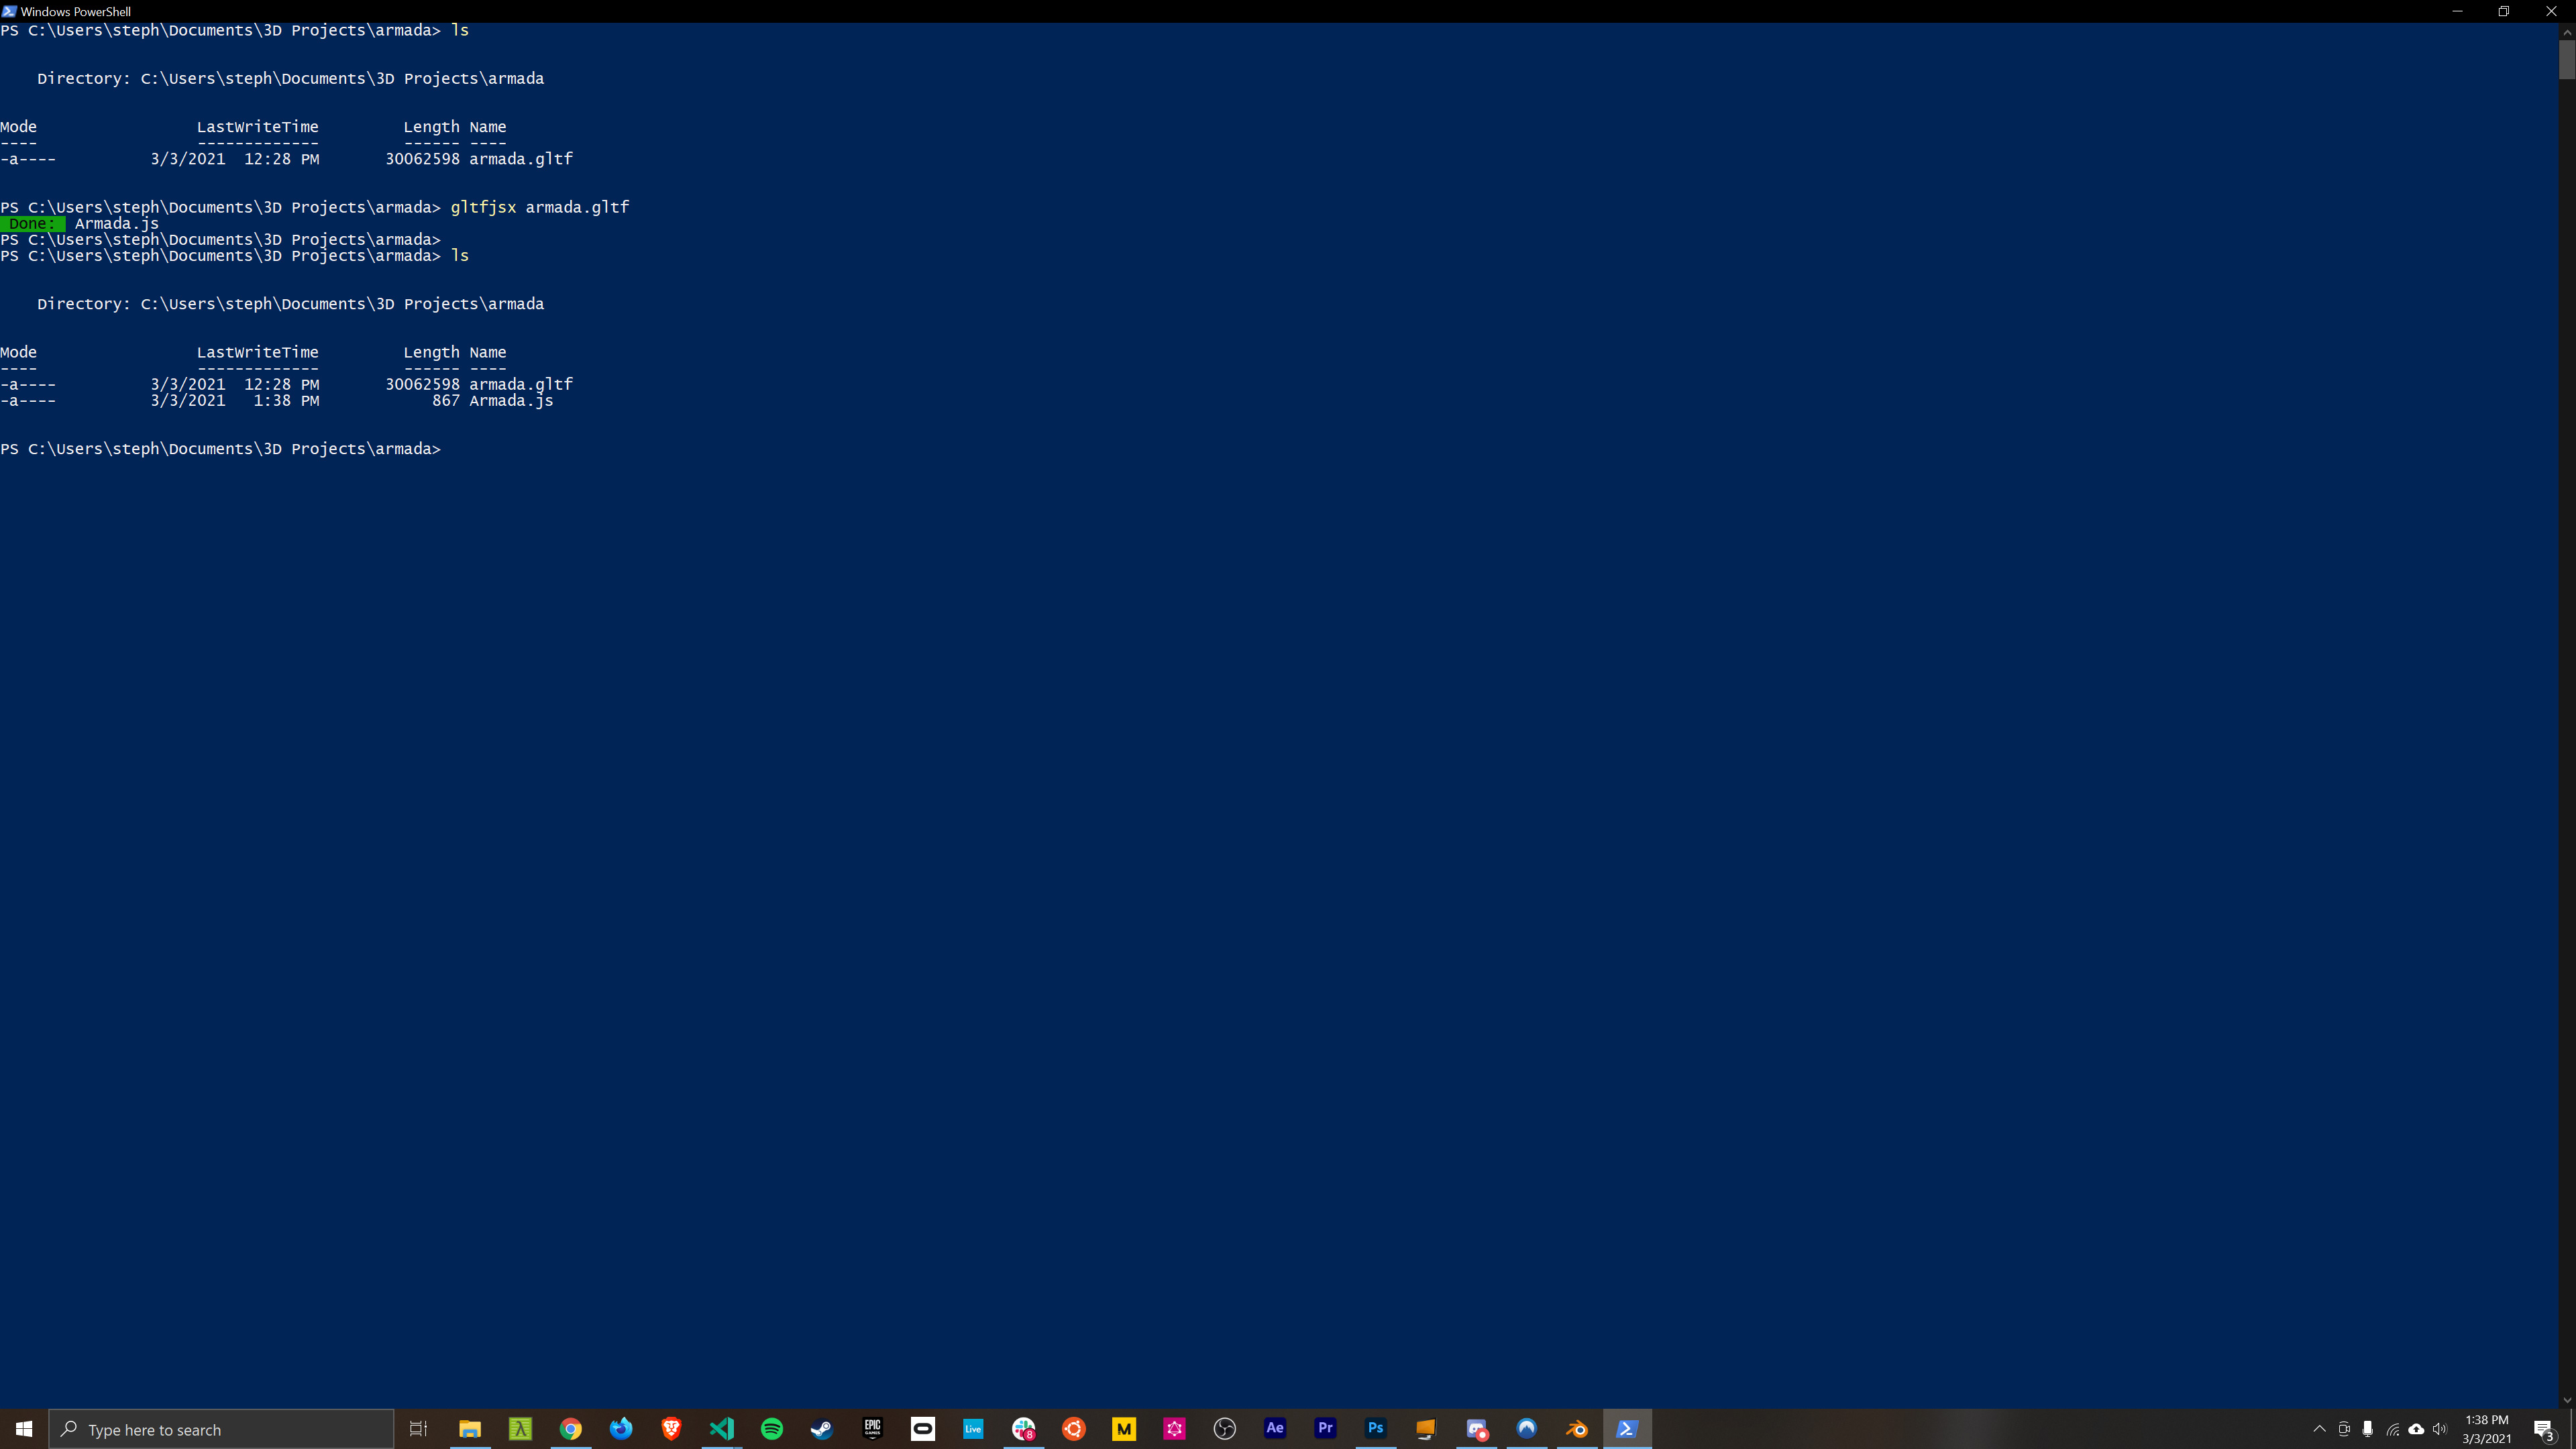
After running this you should see a new file called Armada.js, remember where you saved this file so we can add it to our React project later.
This is what the generated component for our armada.gltf file looks like.
/*
Auto-generated by: https://github.com/pmndrs/gltfjsx
*/

import * as THREE from "three";
import React, { useRef, useState } from "react";
import { useGLTF } from "@react-three/drei";

import { useAnimations } from "@react-three/drei";

export default function Model(props) {
  const group = useRef();
  const { nodes, materials, animations } = useGLTF("/armada.gltf");
  const { actions } = useAnimations(animations, group);

  return (
    <group ref={group} {...props} dispose={null}>
      <group rotation={[Math.PI / 2, 0, 0]} scale={[0.01, 0.01, 0.01]}>
        <primitive object={nodes.mixamorigHips} />
        <skinnedMesh
          material={materials.Ch03_Body}
          geometry={nodes.Ch03.geometry}
          skeleton={nodes.Ch03.skeleton}
        />
      </group>
    </group>
  );
}

useGLTF.preload("/armada.gltf");
Creating a React Three Fiber Scene
We're done with creating the assets we need to use the animated character. Now let's move in to React.
Step 1 Create a new React App
npx create-react-app armada
Step 2 Add the Three.js, React Three Fiber, and drei Dependencies
yarn add three react-three-fiber @react-three/drei
Step 3 Copy the .gltf file and the Armada.js component wrapper in to the react project. Put the Armada.js component in the src directory, and put the armada.gltf file in the public directory.
Step 4 Replace the index.css with the following to make the React Three Fiber canvas fill the entire viewport.
/*index.css*/
* {
  box-sizing: border-box;
}

html,
body,
#root {
  width: 100%;
  height: 100%;
  margin: 0;
  padding: 0;
}

body {
  background: #000000;
  font-family: -apple-system, BlinkMacSystemFont, avenir next, avenir, helvetica
      neue, helvetica, ubuntu, roboto, noto, segoe ui, arial, sans-serif;
}
Step 5 Create an empty React Three Fiber scene. Replace the contents of the App.js file with the following code. This will create an empty scene with OrbitControls and some simple lighting.
import React from "react";
import { Canvas } from "react-three-fiber";

import { OrbitControls } from "@react-three/drei";
import "./index.css";

export default function App() {
  return (
    <Canvas>
      <OrbitControls />
      <ambientLight intensity={0.6} />
      <directionalLight intensity={0.5} />
    </Canvas>
  );
}
Adding the Imported Character to the React Three Fiber Scene
Now it's time to use the Armada.js file we created with GLTFJSX.
Step 1 Import the Armada.js file in to the App.js file.
Step 2 Import Suspense from "react" and import Armada from the Armada component we created earlier.
Step 3 Add a Suspense component inside of the Canvas component.
Step 4 Add the Armada component inside of the Suspense component.
import React, { Suspense } from "react"; //highlight-line
import { Canvas } from "react-three-fiber";
import Armada from "./Armada.js";

import { OrbitControls } from "@react-three/drei";
import "./index.css";

export default function App() {
  return (
    <Canvas>
      <OrbitControls />
      <ambientLight intensity={0.6} />
      <directionalLight intensity={0.5} />
      // highlight-start
      <Suspense fallback={null}>
        <Armada />
      </Suspense>
      // highlight-end
    </Canvas>
  );
}
You should see the character now at the start of the Armada animation, but it's not moving yet. We will take care of that in the next and final step.
Warning
If you see an error about failing to import from drei it might be because the import paths changed in a recent version. Imports that look like this will no longer work
import { useAnimations } from "@react-three/drei/useAnimations";Instead make sure the imports are directly from drei like this
import { useAnimations } from "@react-three/drei";
Playing the Animation
Playing the animation is easy! All you need to do is make a small change to the Armada.js file. Yep the auto generated from from GLTFJSX. The animations will already be available to you as a javascript object provided by the component.
Step 1 Open the auto generated Armada.js component (that came from gltfjsx)
Step 2 In a useEffect hook call the play method on the animation you want to play. The name of the animation will come from the name of the action in Blender! That's why it's so important to rename it before exporting. If you can't remember the name of the animation you want to play you can always console log the actions object in the hook first.
// Armada.js
/*
Auto-generated by: https://github.com/pmndrs/gltfjsx
*/

import React, { useRef, useEffect } from "react";
import { useGLTF } from "@react-three/drei";
//highlight-start
import { useAnimations } from "@react-three/drei";
//highlight-end
export default function Model(props) {
  const group = useRef();
  const { nodes, materials, animations } = useGLTF("/armada.gltf");

  const { actions } = useAnimations(animations, group);
  //highlight-start
  useEffect(() => {
    actions.Armada.play();
  });
  //highlight-end
  return (
    <group ref={group} {...props} dispose={null}>
      <group rotation={[Math.PI / 2, 0, 0]} scale={[0.01, 0.01, 0.01]}>
        <primitive object={nodes.mixamorigHips} />
        <skinnedMesh
          material={materials.Ch03_Body}
          geometry={nodes.Ch03.geometry}
          skeleton={nodes.Ch03.skeleton}
        />
      </group>
    </group>
  );
}

useGLTF.preload("/armada.gltf");
If everything worked you should see your character start to perform the kick animation!
Video Tutorial
Would you rather watch a step by step video of this same tutorial? Watch it here on YouTube.